In this article we will explain how the proxy management feature works. With this functionality you can do the following:
- Adding proxies in bulk (via Standard proxy format, CSV or Excel file)
- Save proxies in bulk so that you can easily add them to a (new) browser profile
- Save your proxies in groups, so that you always have an overview
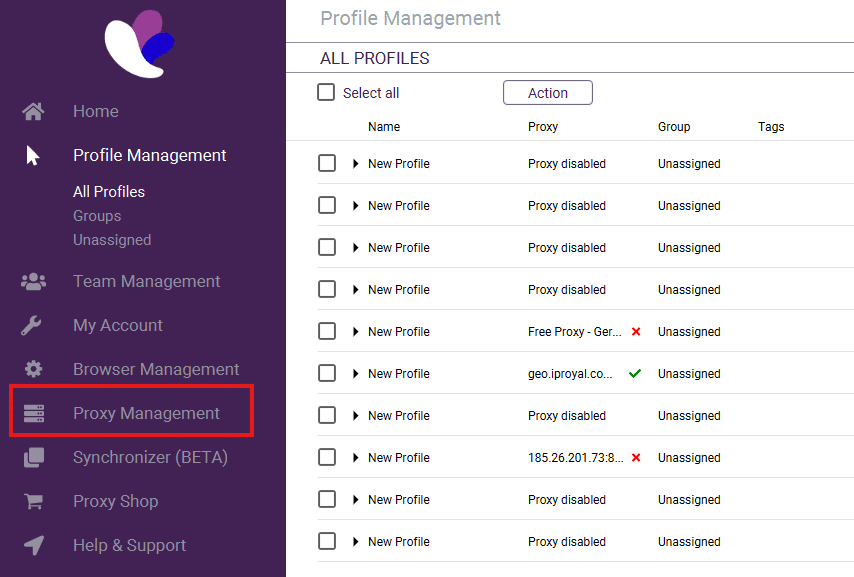
First of all, it is of course important to know where you can find this functionality. This can be found in the browser profile overview and can be opened by clicking on Proxy Management.

Now that you have arrived in the proxy management portal you can do several things. You can manage your already imported proxies, add new proxies both in bulk and single, remove proxies, check connection or rotate the proxies (only works for rotating proxies).
Adding a single proxy to the database
We’ll start by explaining how to add a proxy:
- Go to Create Single Proxy in the left-side menu.
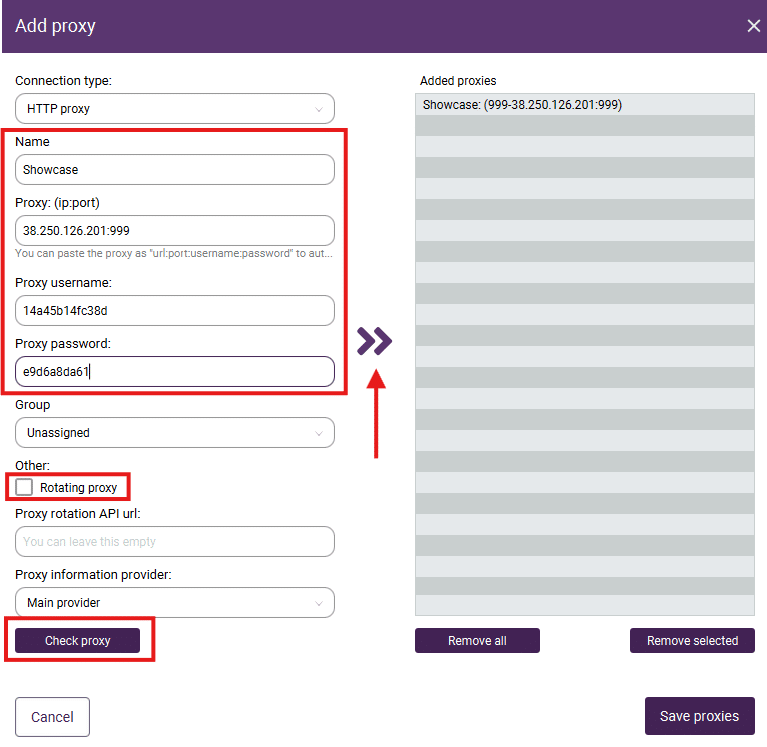
- Then add the proxy details such as the Name, Proxy:PORT, Proxy username, Proxy Password and in the case of a rotating proxy, also check the Rotating proxy option – If desired, you can also add the proxy to a group you have created.
- Next, click on Check proxy and then on the arrows in the middle to add the proxy to the database.

Adding proxies in bulk
You can also add proxies in bulk. This allows you to add all the proxies you use to Incogniton in just a few clicks.
- Click on Create bulk in the left-side menu and a pop-up will appear.
- Choose how to import the proxies in bulk: via standard format, CSV format, CSV file or Excel file.
Standard format
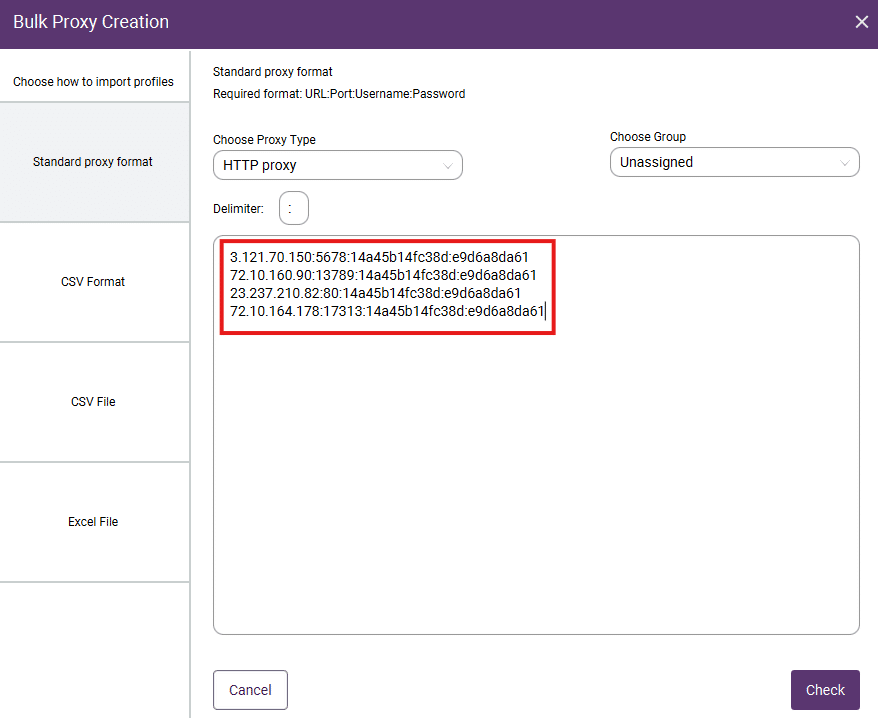
Adding proxies in bulk via the standard format can be done by pasting the proxy, port, username and password in the format as shown below. You can determine the delimite character you want yourself. In this case we have chosen a colon and this is set by default.

CSV Format & Excel Format
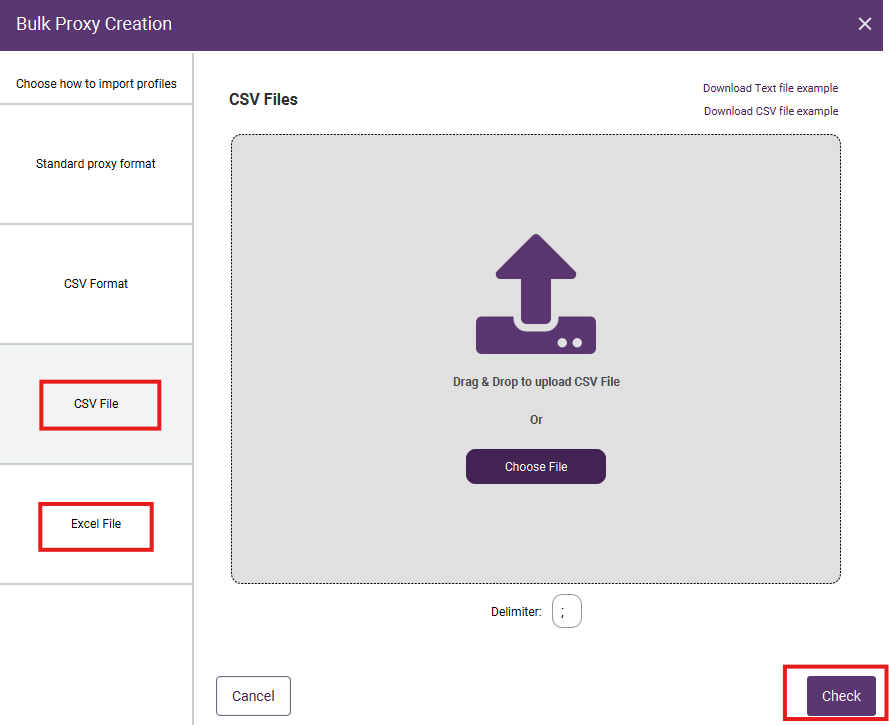
- To import your proxies via Excel or CSV, you must first download the template. The sample document can be downloaded from the application or via this link for CSV or via this link for Excel.
- Fill out the template and save the document to your computer.
- Then click on CSV file or Excel file and upload the document you have completed. In the standard file the semicolon symbol is set as a delimiter. But this can also be adjusted if desired.
- Next, click on Check and the document will be checked and the proxies will be imported into the database. Finally, click on Import and the proxies are saved.

If you still have any questions, please don’t hesitate to contact our support department!


