
In this guide we’ll introduce you to the team member features available in the Professional package and above. With the team feature you can share entire groups of profiles with your team members and assign different permissions to each person. To learn more about the basic features, please read this article.
As a manager, you can control which features are accessible to your team members, such as viewing or launching profiles, adding, deleting, or even transferring profiles. Here’s how to get started:
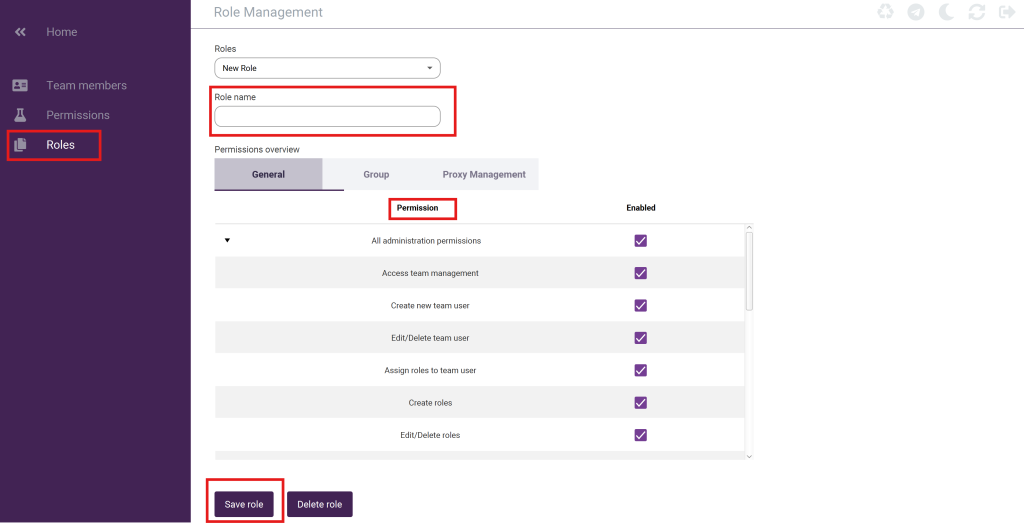
Step 1: Navigate to Team Management in the left-side menu and go to the Roles tab:
- Give the role a specific name.
- Configure the permissions for the role by checking the boxes.
- Save the role.
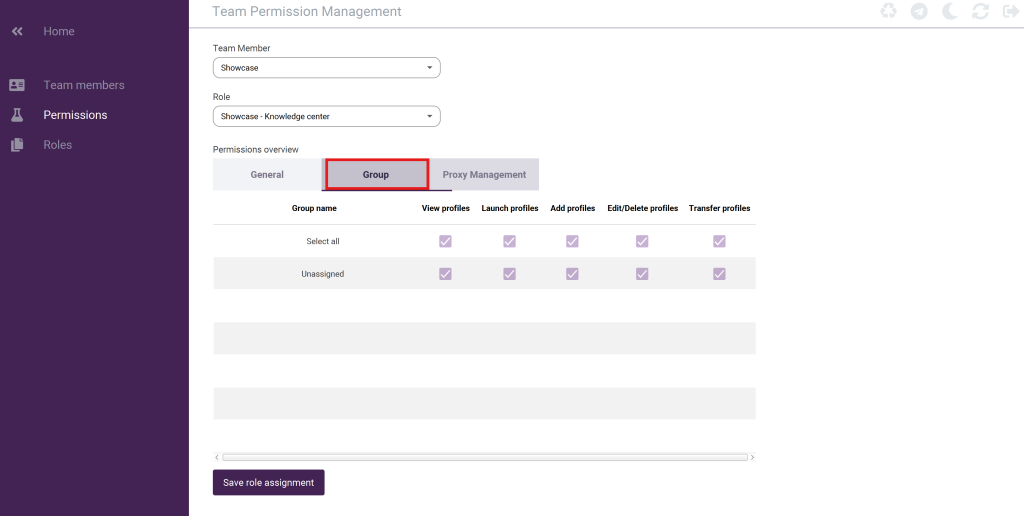
Step 2: Go to the Permissions tab:
- Choose the team member and role.
- Configure the permissions for this specific team member and role by checking the boxes.
- Save the role assignment.

Step 3: Customize Group Permissions:
- In the All group general permissions section, select the following options:
- Create new groups: Allows the user to create new groups.
- Edit/Delete groups: Allows the user to edit and delete groups.
- Launch profiles in all groups: Allows the user to launch browser profiles in all groups.
- Add profiles in all groups: Allows the user to add browser profiles in all groups.
- Edit/Delete profiles in all groups: Allows the user to edit and delete browser profiles from all groups.
- If you want to limit access to certain groups, go to the Group tab. Here, you can assign specific roles to a user for each group, such as launching profiles, adding profiles, and editing/deleting profiles.
If you have any questions about setting up the team feature in Incogniton, feel free to contact our support team for assistance!


