In this guide we explain how the Incogniton Proxy Store works. With this new functionality, you can now purchase your proxies directly via the application, after which they will be automatically imported. You then simply add the proxies to a browser profile and you never have to click unnecessarily again. In this guide we will explain you how to buy these proxies. Also see below an overview of the geolocations that we have available.
Data center proxies:
- United States: Ashburn; VA, New York; NY, Los Angeles; CA, New Jersey; NJ ,Chicago; IL, Boston; MA, Virginia; VA, Washington DC; DC
- United Kingdom: London
- France: Paris
- the Netherlands: Amsterdam
- Canada: Toronto
- Germany: Berlin
Static Residential proxies:
- United States: Virginia; VA
Premium ISP proxies:
- United States: Princeton; NJ, Brooklyn; NY, Los Angeles; CA, North Carolina; NC, Washington; MD, Washington DC; DC, Dallas; TX, Staten Island; NY, Chicago; IL, Miami; FL, Denver; CO, Richmond; VA, Northbrook; IL, Las Vegas; NV, Reston; VA, Middlebury; VT, Ashburn; VA
- United Kingdom: London
ISP proxies:
- United States: Washington DC; DC, Ashburn; VA, Charlotte; NC, Chicago; IL, San Jose; CA, Philadelphia; PA, Houston; TX, Miami; FL, Staten Island; NY
- United Kingdom: London
- France: Paris
Getting started to buy your proxies!
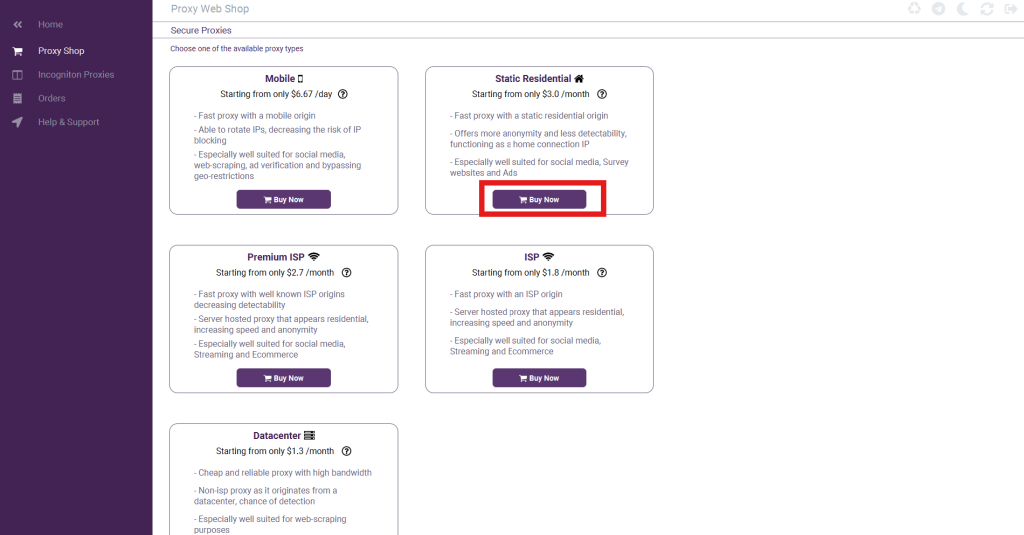
- The Proxy Store accessible in two ways. You can do this is via ‘Proxy Management‘ and then select the option ‘Proxy Shop‘ or you can click in the browser profile on ‘Proxy Shop‘.
- Once clicked you will see the overview of the Proxy Store. Here you can see which type of proxies are offered, the price and their specifications. Please click on Buy Now when you have made your decision. For the availability of geolocations per proxy type see above. You can select the geolocation once you have chosen the amount and the duration in months of the subscription.
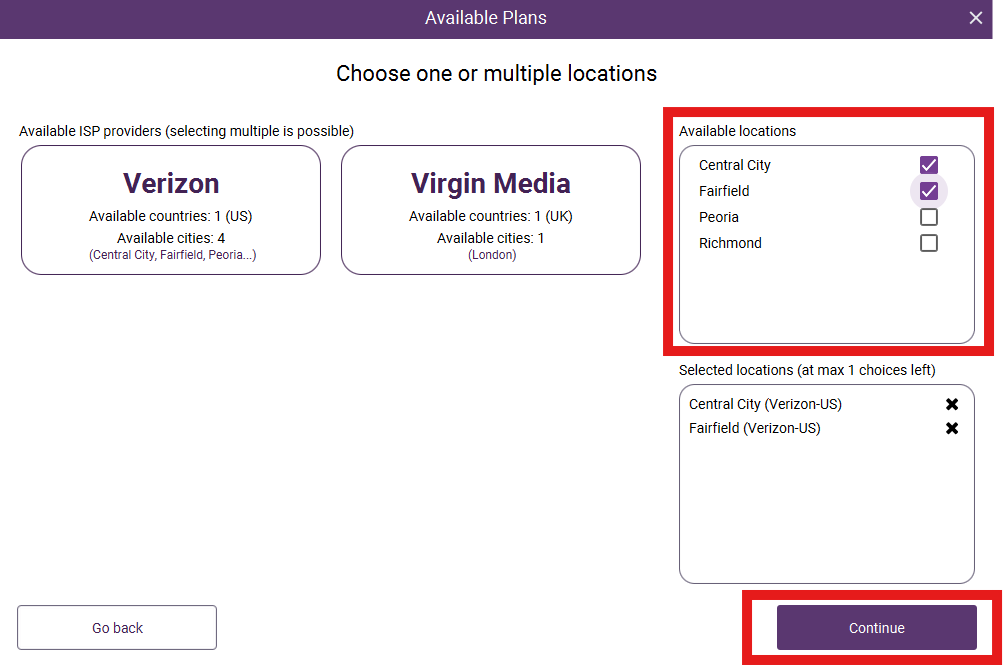
- The next step is that you will see the available plans. Per number of proxies we have specified the price of the plan per month, but also per proxy. Once you click on buy you will be able to choose your location(s).
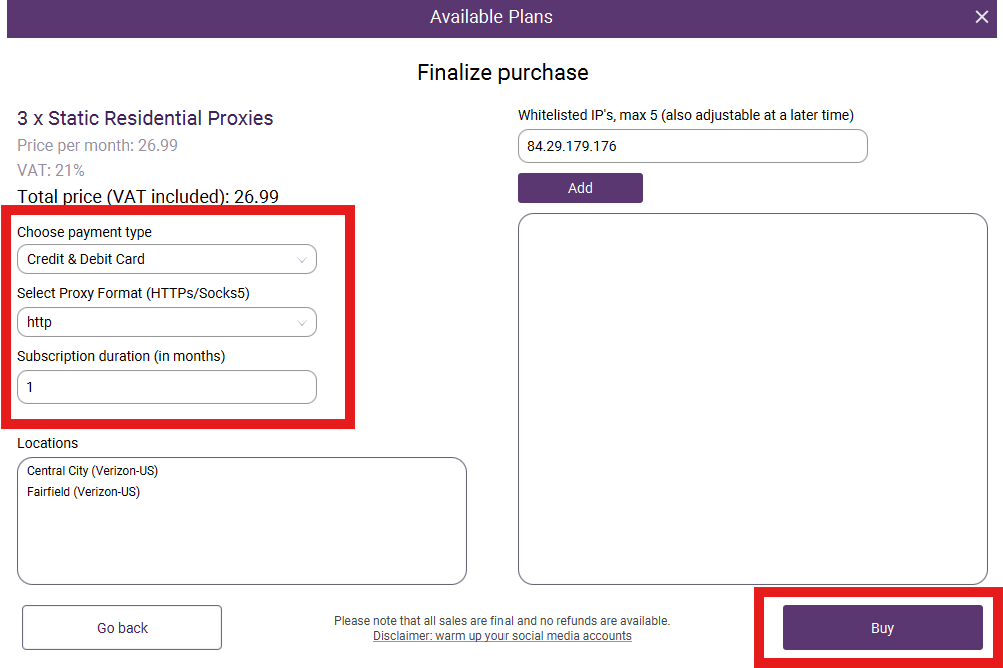
- Now you will be able to finalize your order. You will see the final price and your chosen locations, are able to choose the duration of your subscription in months, and select your payment type and proxy format. When you click on Buy the payment terminal will be opened.
- Once you completed the check out you can go back to the Incogniton application and click on Incogniton Proxies at the left on your screen you will see your ordered proxy specifications.
- In the Orders tab you will see your order history. Here you can also extend your subscription by clicking on the three dots and extending the months.
- Now it’s time to add the bought proxies to your browser profiles! The easiest way to do this is when you click on create single in Profile Management and afterwards Proxy and then Proxy Management on the left side of your screen. Your new proxy will pop up and you can easily select it to add it to a profile. When you click on Create Profile the profile is ready to use!
Like to know how to renew your subscription? Read about it in this article!
If you still have any questions, please don’t hesitate to contact our support department!