
Step 1: Set up your Incogniton account
- Download and install Incogniton from the official site for your operating system (Windows or macOS).
- If you don’t have an account, register before opening the app, then sign in.
Step 2: Get your anyIP credentials
- Sign in to your anyIP dashboard and go to Dashboard > Proxies.
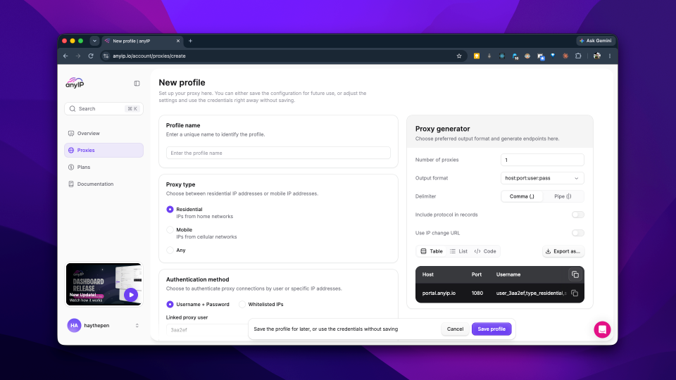
- Select Get Proxy Details to retrieve your username and password. Remember that anyIP doesn’t send a separate proxy list file or email; your credentials live in the dashboard.
- If you need multiple configurations at once, use the Proxy List Generator (click the green button on the Proxies page) to bulk-generate them; your usage is capped by your plan’s GB allowance rather than a fixed proxy count.
Step 3: Build your proxy connection string
- anyIP uses one host and port for every proxy type: anyip.io on port 1080 or 443, supporting HTTP/HTTPS and SOCKS5 on the same port.
- Proxy type and location are set inside the username itself, using flags like type_residential, type_mobile, and country_US. Leaving the type flag off gives a mixed/auto assignment. For more information, refer to the anyIP “Configuration” documentation.
- Optionally, confirm that the credentials are valid by sending a proxied request through cURL to an IP-checking service before starting Incogniton. A successful response shows an IP different from your home connection.
Step 4: Create a browser profile
- In Incogniton, go to Profiles in the left-side menu and select New Profile in the top right.
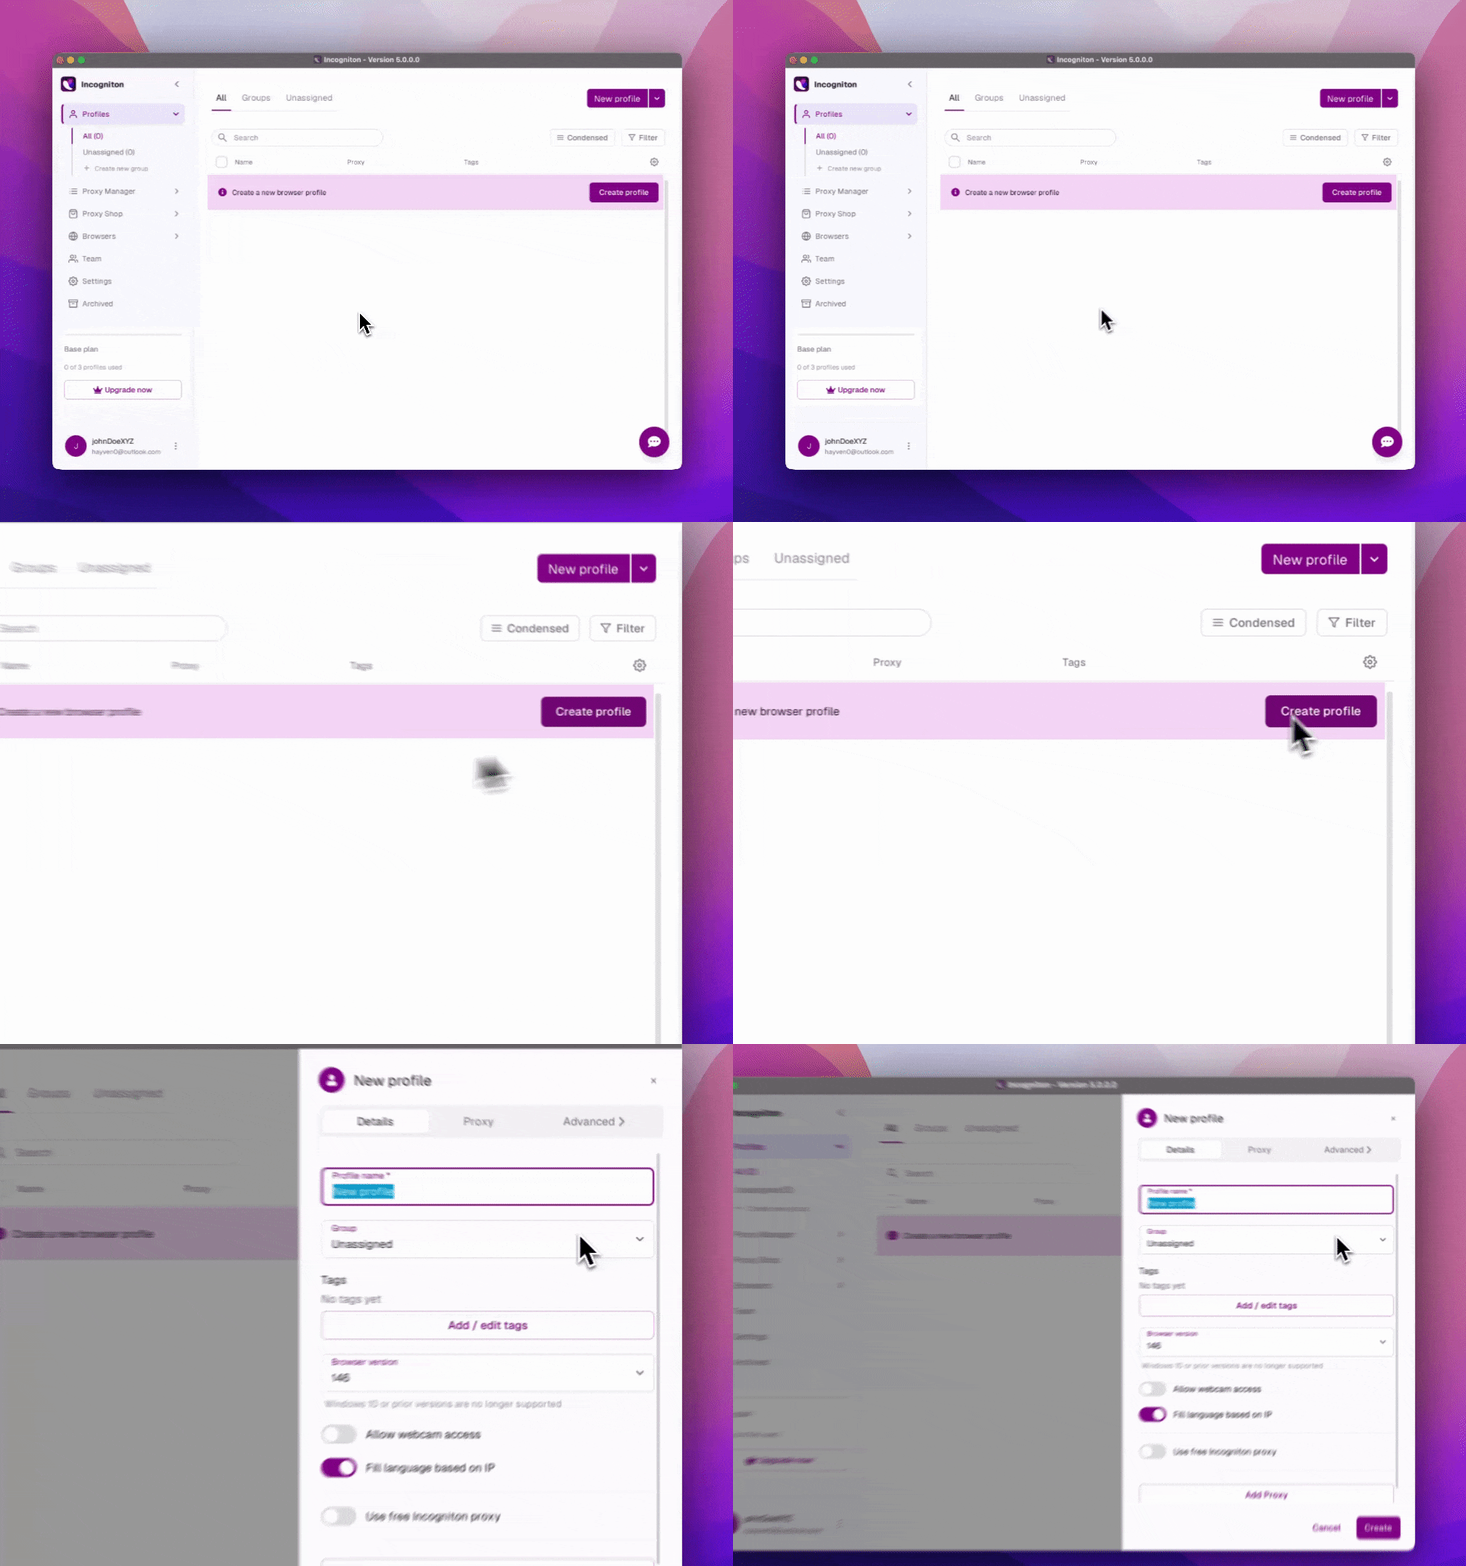
- Name the profile after the account it will hold.
Step 5: Add the proxy to your profile
- Open the Proxy tab of your new profile and select Custom proxy.
- Set Connection type to HTTPS, since Incogniton’s custom proxy form supports HTTPS and SOCKS5 only, not plain HTTP. Use anyIP’s HTTPS port (443) rather than the HTTP example above.
- Enter your proxy address in the Proxy (IP:port), then fill in your Proxy username and Proxy password using the credentials and flags from Step 2 and 3.
- Select Check to confirm the connection is live and returning the correct location, then save your profile.
Step 6: Launch and verify
- Select Start on your configured profile.
- Inside the browser window, open an IP-checking service to confirm the expected IP and location.
- Once verified, your profile is ready: isolated browser state, dedicated proxy, configured once and reused every session.
Conclusion
Once this is set up, each Incogniton profile launches with its own proxy, fingerprint, and browsing lane. AnyIP encodes proxy type and geo directly into the username rather than issuing a separate port per plan, so switching targeting means editing that one string.

