How to Set up Decodo in Incogniton
Decodo offers easy-to-use, top-notch and affordable solutions for scraping API’s and proxies. With an average of 4.8/5 Trustpilot rating on 1,000 reviews, it’s safe to say they’ve kept their end of the bargain in terms of their two main services.
On the other end, the Incogniton browser has become synonymous with true incognito browsing, providing you with 10 unlinked browser profiles for free. For context, that’s like owning 10 different laptops in 10 different locations to browse the internet. Now, imagine combining both tools.
This comprehensive guide walks you through each step of setting up Decodo in the Incogniton antidetect browser, leaving no details out.
- Trusted by 1 million+ users

How to set up Decodo in Incogniton
Step 1: Create and Sign in to your Incogniton account for free
To get started with the Decodo-Incogniton integration, you need the Incogniton app and an Incogniton account. Thus, if you already have both, skip ahead to the next step.
- Visit the official Incogniton website at incogniton.com and locate the “Download” option on the navigation bar.
- On the download page, select the appropriate link for your OS (Mac or Windows) to begin downloading the Incogniton app.
- After the download is complete, follow the provided installation steps to install the Incogniton app on your computer.
- Return to the Incogniton website.
- Navigate to the pricing page via the hero section or the navigation bar.
- Explore the available plans – including Starter (free), Entrepreneur, Professional, and Multinational. Opt for the Starter plan if you’re new to Incogniton.
- Complete the registration process by following the provided instructions to create your Incogniton account. You’ll receive your login details.
- Open the Incogniton app on your computer and sign in using your login credentials.
If you face any trouble, please reach out via [email protected]. If not, proceed to set up your Decodo proxy.
Step 2. Set up a Decodo account
- Visit the Decodo website via this link.
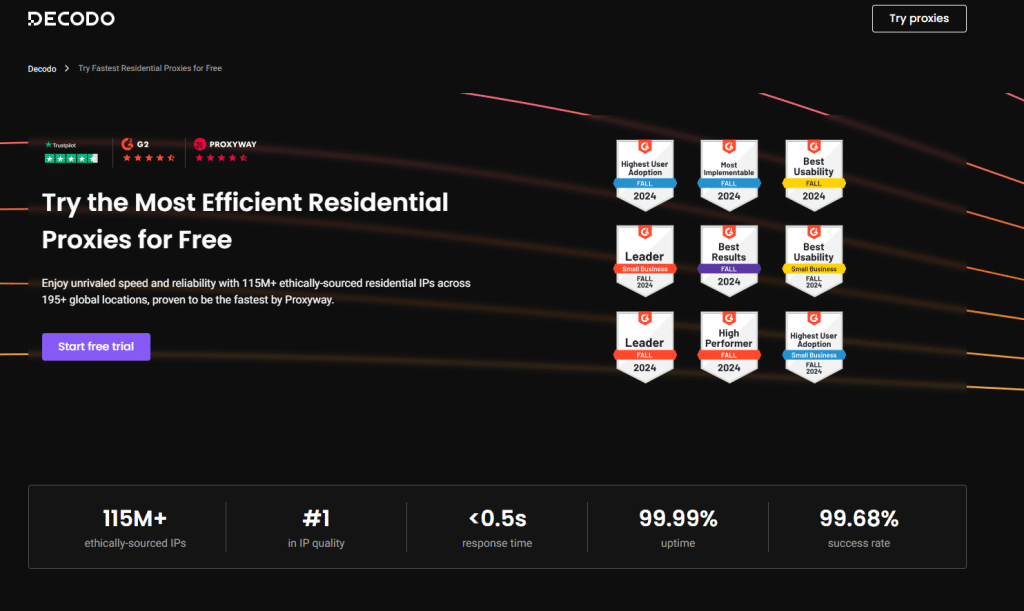
- Click the Start free trial button to register.
- Fill out the registration form (or proceed via Google authentication) to create an account.
- Once you complete the registration process successfully, you will be redirected to your dashboard.
Step 3. Generate a Decodo port
- On the dashboard tab, select your preferred proxy type (including residential, mobile, static, and the datacenter proxy variants). You can also do this via the sidebar as shown in the image below.
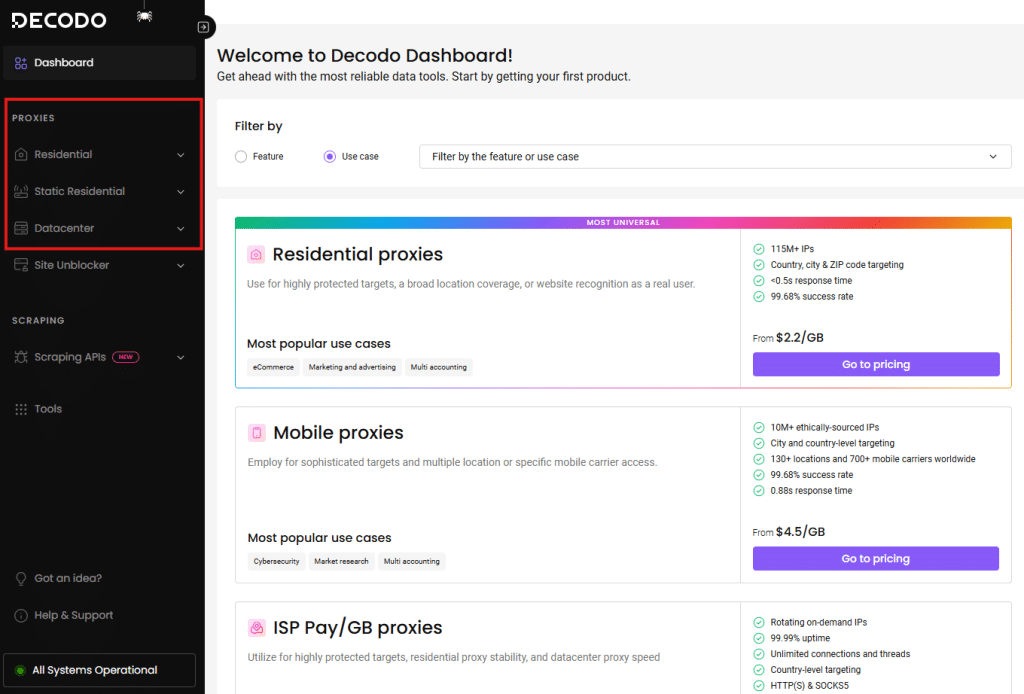
- Click the “Go to pricing” button to get the available pricing plans for the chosen proxy type.
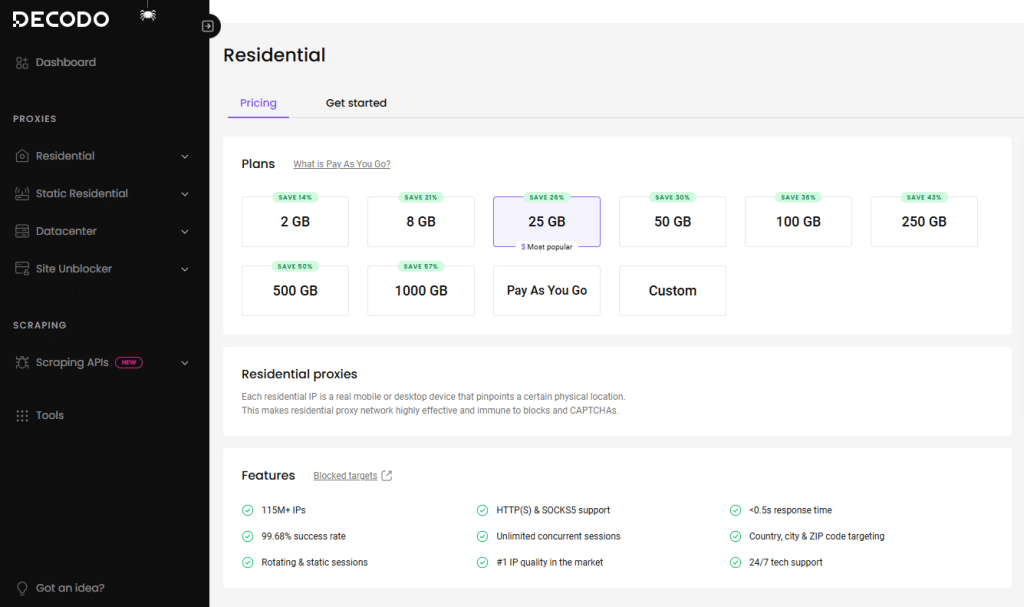
- Choose your preferred plan from the list and proceed to purchase the proxy.
Step 4. Integrate your Decodo port with Incogniton
This is the final and most delicate part of the process, so please pay rapt attention to what follows.
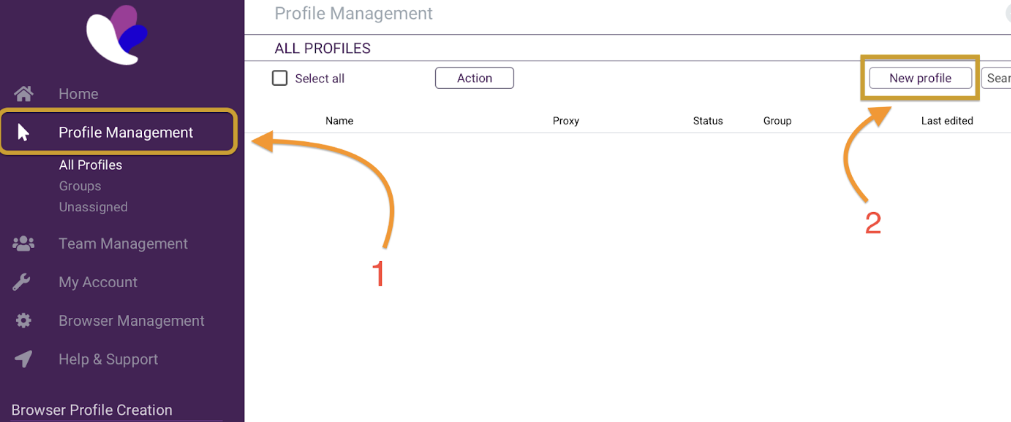
- Open the Incogniton app and navigate to “Profile Management’ on the sidebar.
- Click the “New Profile” button to create a new browser profile. If for any reason you are not able to create a profile or you need a more detailed guide, check out this guide.
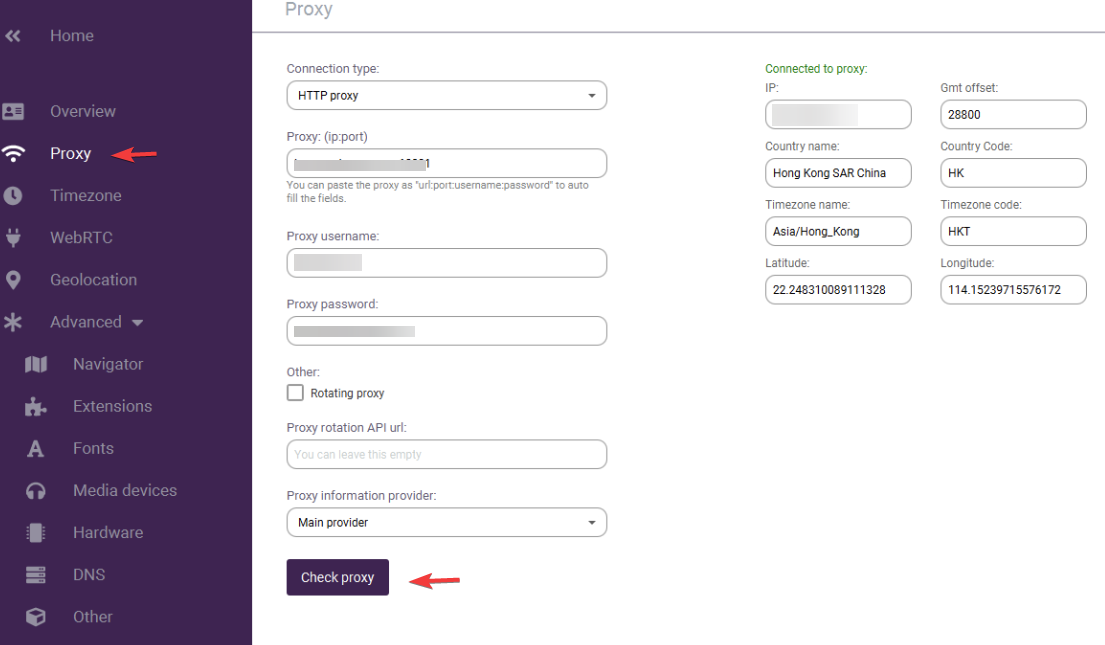
- Navigate to Proxy via the sidebar.
- Proceed to fill in your Proxy details as shown below.
- Upon completion, click “check proxy” and “create profile” to start. See the image below.
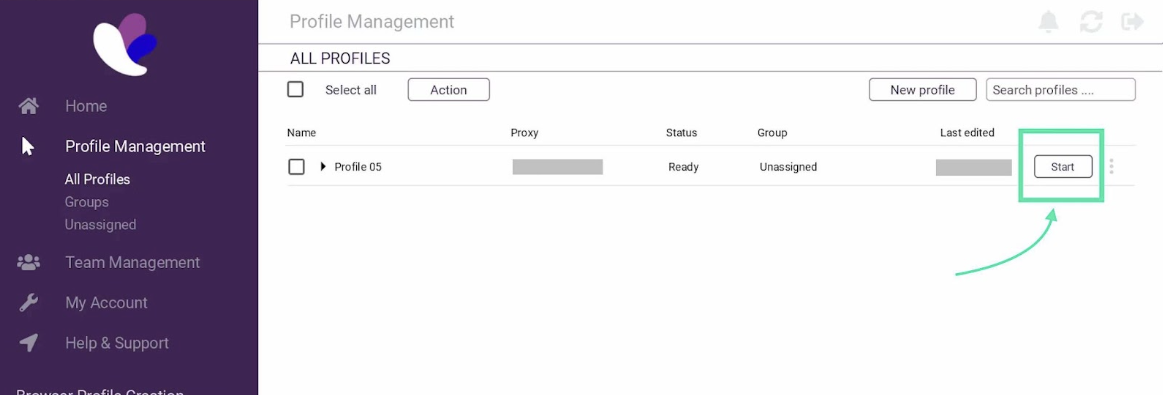
- Now click the “Start” button on your new profile, as shown in the image below, to activate it.
And there you go! You have successfully set up Decodo with Incogniton, and you can now browse the web without the fear of being monitored, tracked, or constrained.
Conclusion
In this guide, we’ve walked you through the seamless integration of Decodo with the Incogniton antidetect browser. We began by creating and signing in to your free Incogniton account. Next, we set up a Decodo account and generated a Decodo port. Finally, we seamlessly integrated your Decodo port with Incogniton.
By following these steps, you’ve seamlessly integrated Decodo with Incogniton, enhancing your online privacy and security. Enjoy.
By the way, if you encounter any difficulties or have questions during the integration process, don’t hesitate to contact our help team via [email protected] It will be our pleasure to assist you.
What are you waiting for? Join 1 million+ users now!
Frequently asked questions (FAQ)
There are various proxy types, each serving specific purposes:
- Residential Proxies: Use IPs from ISPs, appearing like regular users. Static Residential proxies, known for high reliability, are often preferred in Incogniton.
- Datacenter Proxies: Hosted in data centers, offering speed but may not be as discreet.
- Mobile Proxies: Mimic mobile users, useful for app testing and social media tasks.
- Shared vs. Dedicated Proxies: Shared among users vs. dedicated for an individual, allowing more control.
- Static (ISP) vs. Rotating Proxies: Static maintains a consistent IP while rotating change IPs automatically.
As you may have noticed, selecting a proxy would depend on your specific needs. However, for Incogniton, the reliability of Static (ISP) Residential proxies often makes them an ideal choice.
If you encounter any challenges integrating Decodo with Incogniton, feel free to contact our support team at [email protected].
Yes, you can manage multiple Facebook accounts with Incogniton’s browser profiles, and for free, as the free tier covers up to 10 unique profiles. Check out this article on how to manage multiple Facebook accounts for a more detailed guide.
While this guide touched on what’s needed to set up your Browser profile, we have a dedicated resource, including a video tutorial, that explains the steps in more detail. Check out our guide on how to set up a browser profile in Incogniton.
By connecting to the internet through a proxy server, your IP address is masked via a proxy server, making it difficult for websites and online services to track your browsing habits and identify your physical location.
This enhanced privacy can help protect your personal information and online identity, allowing you to browse the web more anonymously and securely.
Decodo, established in 2018 and formerly Smartproxy, is a distinguished proxy service renowned for its two core offerings: Scraping APIs and Smart Proxies. It stands as a trusted solution for users seeking seamless web data collection.
The service not only bolsters online privacy and security but also serves as a vital resource for web scraping and data retrieval endeavors.
Using a proxy, such as with Incogniton or any browser, is essential to safeguard your online privacy and security. Without a proxy, your real IP address and location are exposed to every website you visit, even if it claims to be secure.
When you operate multiple profiles without the protection of a proxy, these profiles can be linked together, potentially compromising your online privacy. To understand how websites perceive your IP address and location, you can use the whoer.net online tool.
