How to Set up PiaProxy in Incogniton
Time and time again, Incogniton has set new heights in antidetect browsing — be it offering the best-in-market starter tier of 10 free profiles or providing a seamless experience integrating the browser with the industry’s most reputable proxies.
PiaProxy is a great example of the latter, boasting a pool of 350M+ IPs with 99.9% uptime while covering an impressive 200+ countries. So yes, you are making a good decision to join their forces.
This guide outlines the step-by-step integration of PiaProxy into your Incogniton browsing experience, covering Incogniton account setup, Proxy portal creation, PiaProxy Manager installation, and the final configuration within the Incogniton browser.
- Trusted by 400,000+ users

How to Integrate PiaProxy Proxies With Incogniton
Step 1: Create and Sign in to your Incogniton Account (Free)
To integrate PiaProxy, you need an operational Incogniton account. If you already have an Incogniton account, you can skip this. Else, follow the steps below to set up Incogniton (without your credit card information):
- Visit incogniton.com and click on the Download link on the navigation bar.
- On the download page, click the appropriate download button for your device’s OS (Mac or Windows) to initiate the download.
- Once the download is complete, proceed to install the Incogniton app on your computer following the installation steps.
- Return to the Incogniton website.
- Click the “Try 10 browser profiles for free” button on the hero section, which takes you to the pricing page.
- Explore the available plans, including Starter (free), entrepreneur, professional, and multinational. If you are just getting started, opt for the Starter (free) package.
- Follow the provided instructions to register and create your Incogniton account. After completion, you’ll receive login credentials.
- Finally, open the downloaded Incogniton app on your machine and sign in with the obtained login details.
And that’s it! You now have a functioning Incogniton account. Time to set up your PiaProxy.
Note: Should you encounter any challenges or need further guidance during the account setup, don’t hesitate to contact [email protected] for assistance.
Step 2. Create Your PiaProxy Account
Follow the steps below to create a PiaProxy account:
- Visit the official PiaProxy website and click the Register button on the top right corner of the page.
- On the registration page, fill out the registration form to create an account (or proceed via Google/Apple authentication).
Step 3. Set Up The Proxy Portal
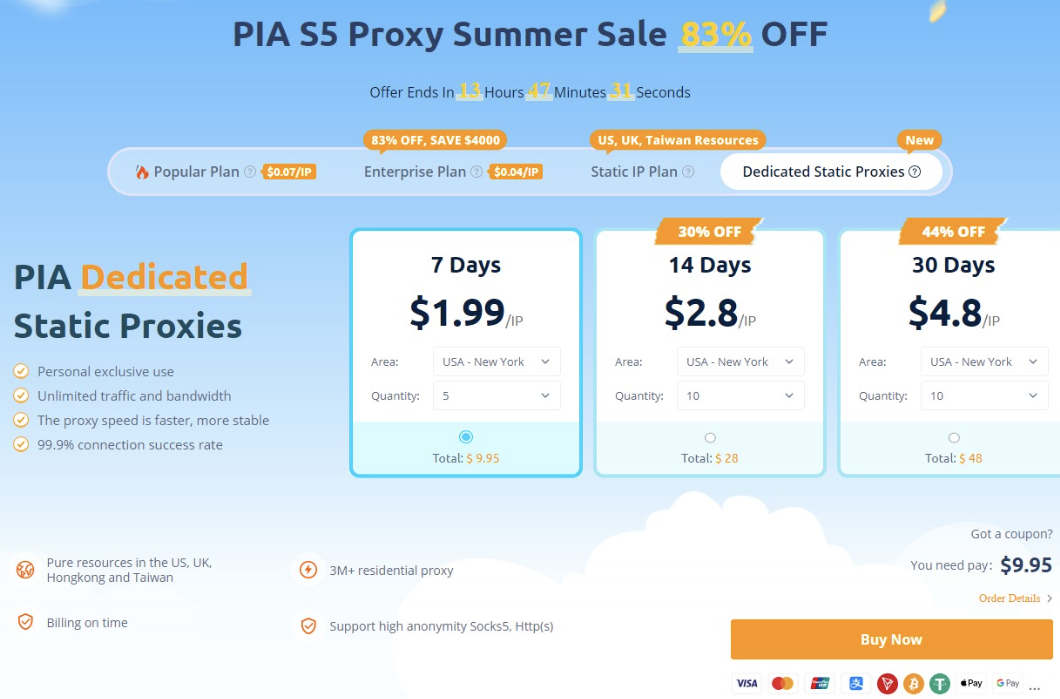
Upon successful registration, your dashboard should look like the one in the image below.

- Choose a Proxy plan to purchase from the dashboard and set up a Proxy portal. If you need help with this, check out the PiaProxy user guide.
Step 4. Download and Install the PiaProxy Manager
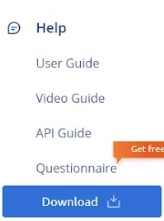
- Click on the Download button at the bottom of the sidebar.
Step 5. Create a Port for your Proxy
- Open the PiaProxy manager app and sign in.
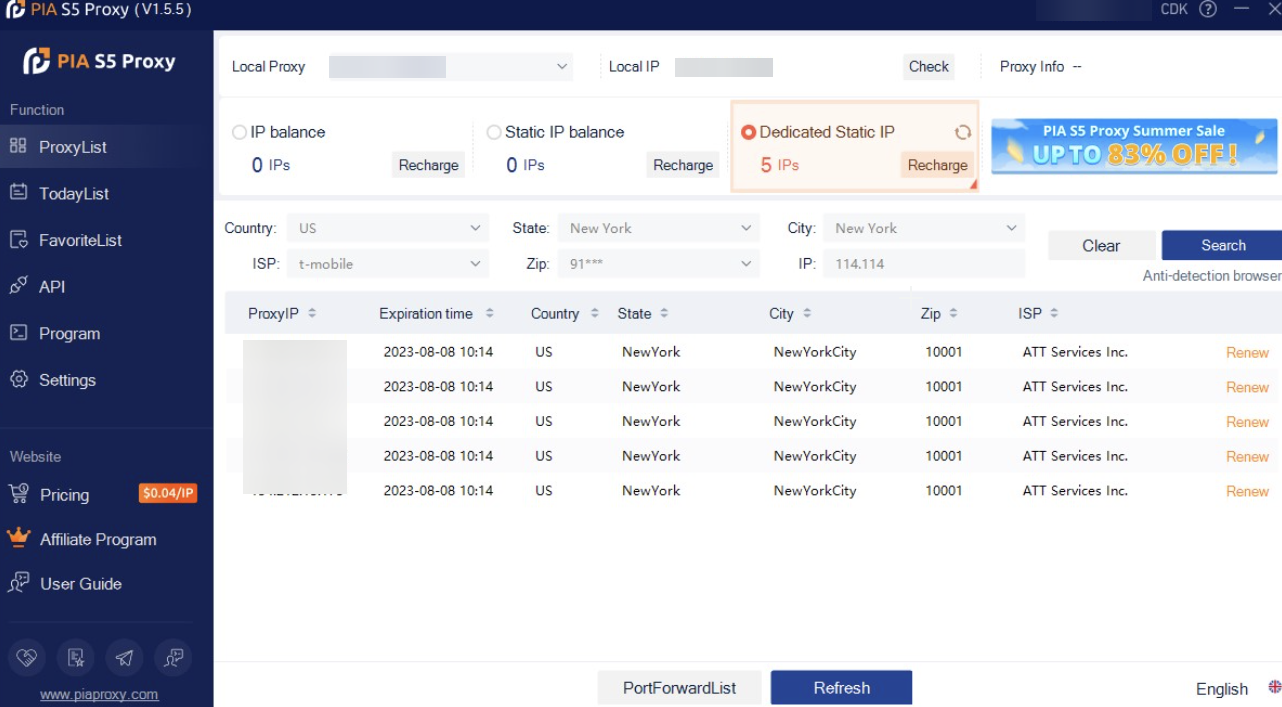
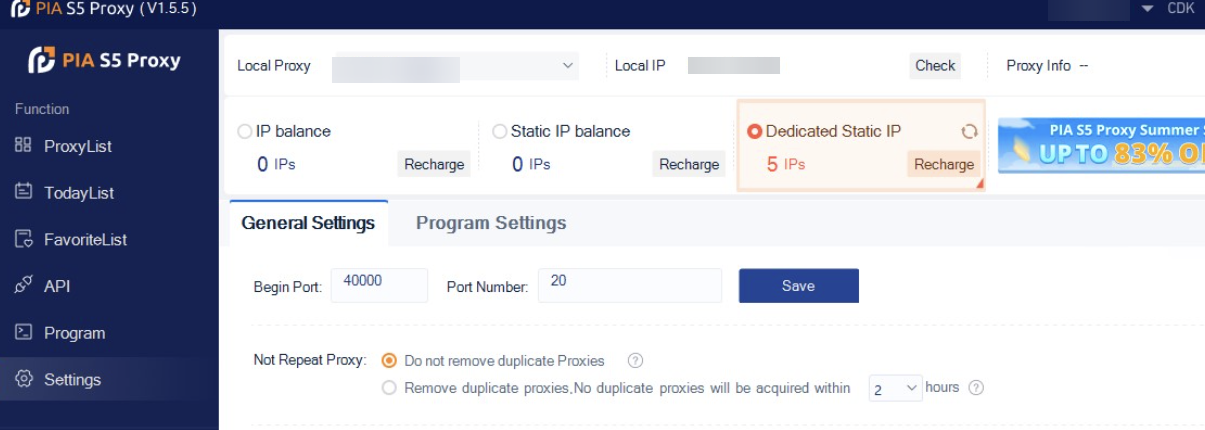
- Navigate to Settings on the sidebar.
- Click the General Settings tab, fill in the Port details and save your changes.
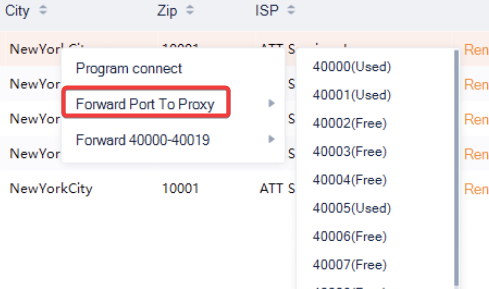
Step 6. Integrate your PiaProxy with Incogniton Browser
- Open the Incogniton browser and navigate to “Profile Management’ on the sidebar. Click on the “New Profile” button.
- On the Profile Overview page screen, click on the “Proxy” button on the sidebar
- Proceed to fill in your Proxy details as shown below. The PiaProxy IP typically begins with “127” (127.0.0.1) which refers to your local machine, also known as “localhost”.
- Upon completion, click “check proxy” and “create profile” to start. See the image below.
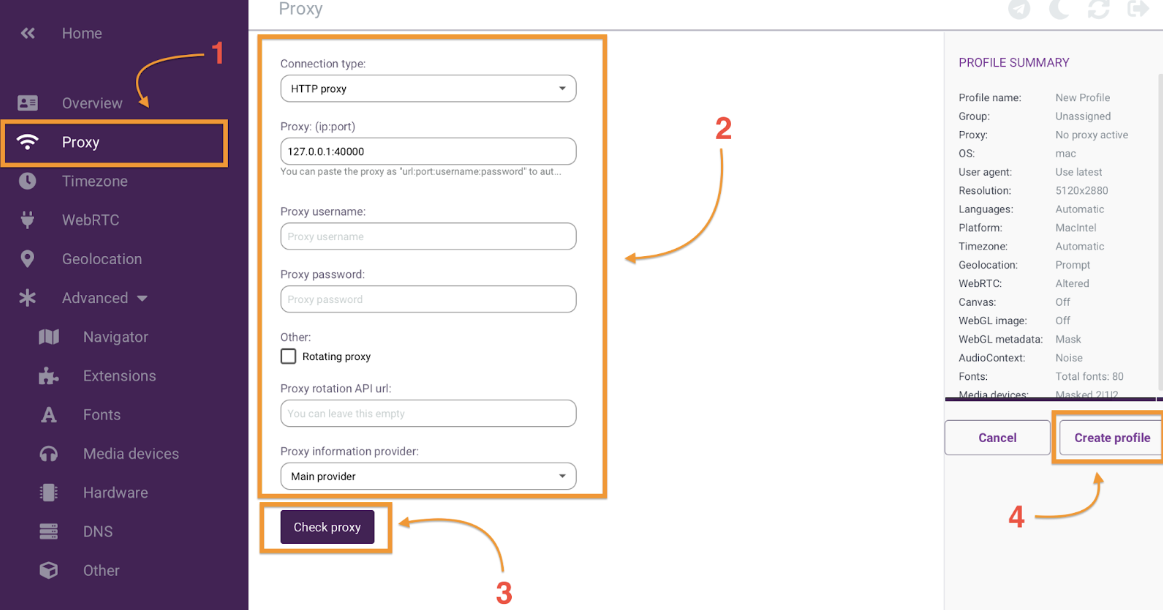
And you are good to go! You’ve completed the process of integrating your proxies with Incogniton successfully. Once you initiate your profile by clicking the “Start” button, an incognito browser window appears to engage in your online tasks with the level of privacy and anonymity you require.
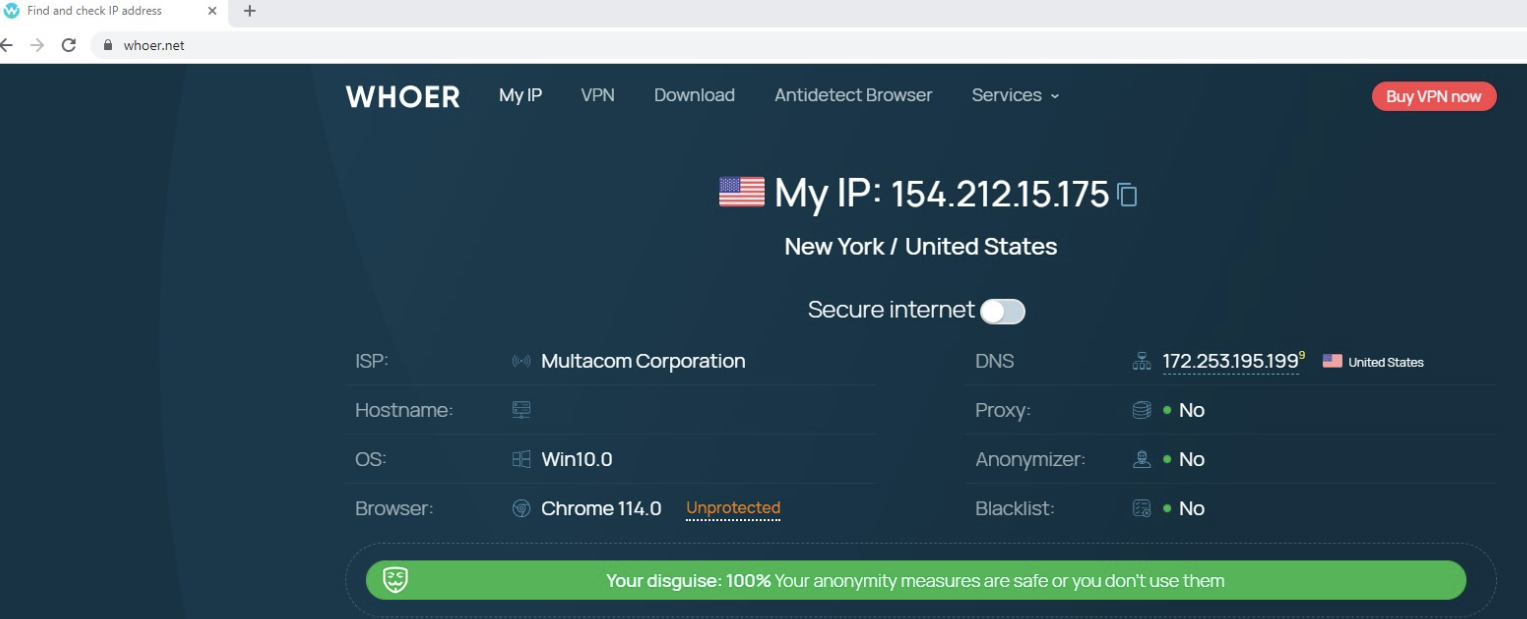
Note: You can verify your proxy configuration using a tool like whoer.net. Whoer assess various aspects of your proxy server, such as its IP address, location, and anonymity level, to help you confirm your proxy is working OK.
Conclusion
The fusion of PiaProxy with Incogniton opens the door to a new level of secure and confidential online activities. By following the steps laid out in this article, you’ve taken the first step toward navigating the internet anonymously, and with enhanced privacy and security.
With Incogniton’s double-digit free browser profiles and PiaProxy’s robust proxy solutions, you’re ready to embark on a worry-free online journey, ensuring your digital footprint remains your own.
What are you waiting for? Join >400K users now!
Frequently asked questions (FAQ)
Using a Proxy or an Antidetect browser significantly enhances your online privacy and security. These tools empower you to cloak your actual IP address, rendering it difficult for websites and online platforms to trace your browsing patterns (via Browser fingerprinting) or pinpoint your physical location.
This combination (antidetect browsers x Proxy) is particularly advantageous for maintaining your anonymity during web sessions, whether you’re accessing content restricted to certain regions or evading personalized ads.
In simple terms, an antidetect browser protects you from browser fingerprinting while a proxy server serves as a middleware between your device and the internet, routing your online requests through its IP address to mask your identity.
If you would like to learn more, check our comprehensive guide on everything you need to know about antidetect browsers.
PiaProxy is a proxy service that allows you to route your internet traffic through its servers, providing you with enhanced privacy and anonymity by masking your IP address and encrypting your online activities. Check the official PiaProxy website for more info.
A proxy browser employs a proxy server to connect to the internet. Acting as a mediator between your device and the web, the server receives and forwards your requests, enhancing privacy by masking your IP address. PiaProxy in itself is a Proxy Server.
The key distinction between HTTP and SOCKS proxies lies in their functionality. While both are proxy servers that mediate your connection to the internet, SOCKS proxies are versatile and can handle various types of traffic, making them general-purpose proxies.
On the other hand, HTTP proxies are tailored for handling web traffic specifically, making them more specialized in their use case. But there’s a whole lot more going on under the hood – check our article on SOCKS vs. HTTP proxy for more.
While this guide touched on what’s needed to set up your Browser profile, we have a dedicated resource, including a video tutorial, that explains the steps in more detail. Check out our guide on how to set up a browser profile in Incogniton.