How to Set Up an IPRoyal Proxy in Incogniton
Without a shadow of a doubt, you need a strong proxy to make the most of Incogniton’s phenomenal multiple accounts management offers, alongside security and privacy prowess.
And with over 8 million IPs, a competitive starting price of $1.75 for over 195 countries, and a promised 24/7 customer support at your disposal, it’s no surprise you’re considering IPRoyal as the partner proxy for your Incogniton experience.
In the next couple of minutes, this article will take you through the step-by-step procedure of registering & setting up IPRoyal proxies in Incogniton so you can start to benefit from safe, truly private, and dependable web browsing.
- Trusted by 400,000+ users
How to Set Up an IPRoyal Proxy in Incogniton
To set up your IPRoyal proxies in Incogniton, start by following these steps:
Step 1. Create and set up your Incogniton Account
Before integrating IPRoyal proxies, it is necessary for you to have an active Incogniton account. The Incogniton app should be also installed and set up on your device.
Visit incogniton.com to download and install the Incogniton app. Below you have the steps in detail:
- Visit the official Incogniton website and locate the download page through the header menu.
- Proceed to initiate the download process by clicking on the appropriate download button based on your device’s operating system (Mac or Windows).
- After successfully downloading the software, go ahead to install it on your device.
- Return to the Incogniton website, and navigate to the Pricing page to pick the plan that best suits your needs (options include free, entrepreneur, professional, and multinational).
- Follow the registration process as instructed and create your Incogniton account. Upon completion, you will receive login details for future access.
- Finally, open the downloaded Incogniton app and sign in using the credentials you obtained during registration.
Step 2. Create an IP Royal account
Visit the IPRoyal website and create an account by clicking the register button located in the top right corner of the page.
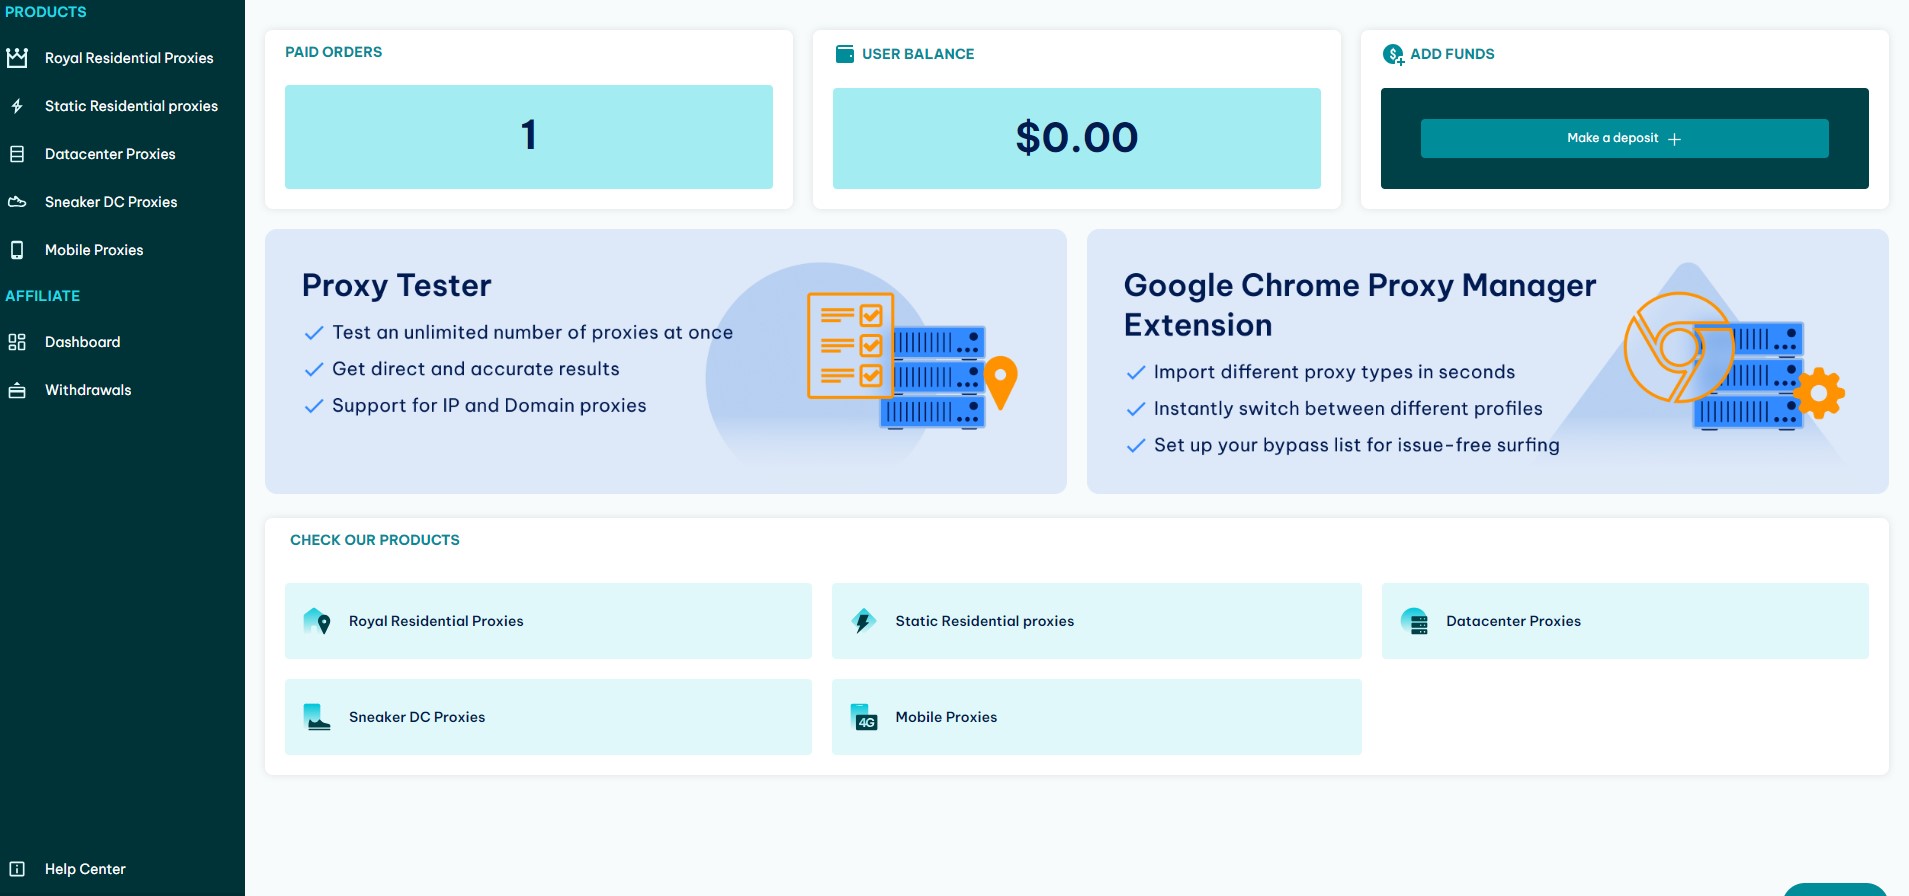
Step 3. Set up the Proxy Portal
Go to the proxy portal after setting up an IPRoyal account. Configure your proxies by following the steps provided by IPRoyal.
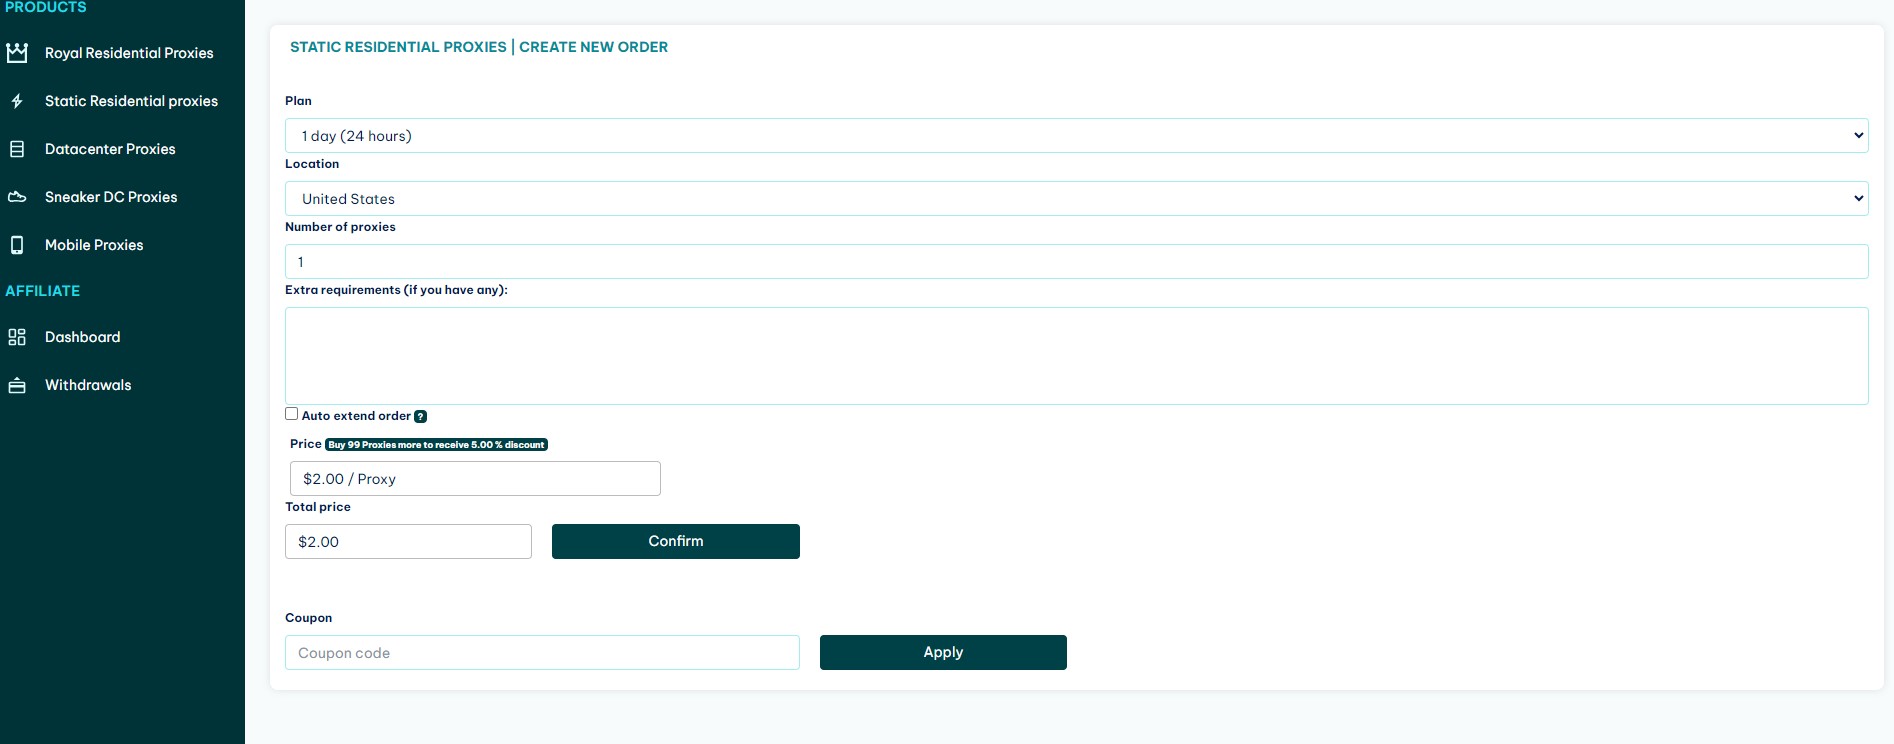
The next step is to order a new proxy.
Step 4. Get your Proxy Details
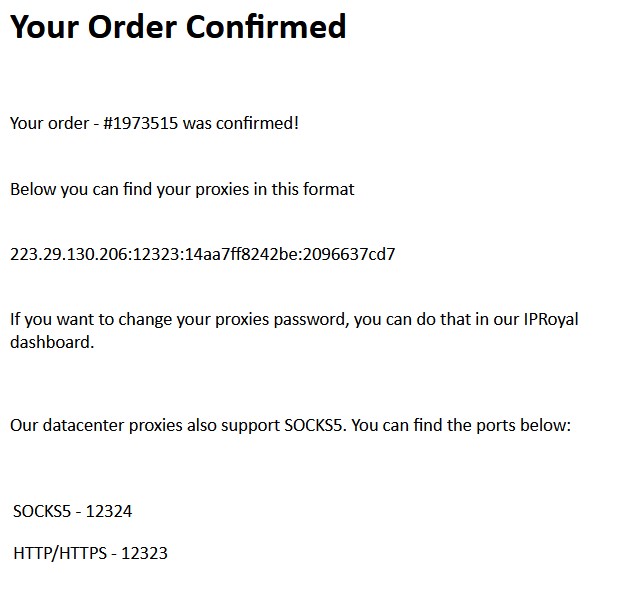
An email will be sent to you containing the details you will need to paste into an Incogniton profile.
You will get your proxy’s IP address, port number, username, and password from IPRoyal once the configuration is complete. Note this information down because you’ll need it for the next action.

Step 5. Fill in All The Details IPRoyal Provided You
To begin, please enter all the information that IPRoyal has given you and click Check Proxy and Create Profile respectively.
Enter the required details, including the connection type (HTTP, HTTPS, SOCKS4 or SOCKS5)
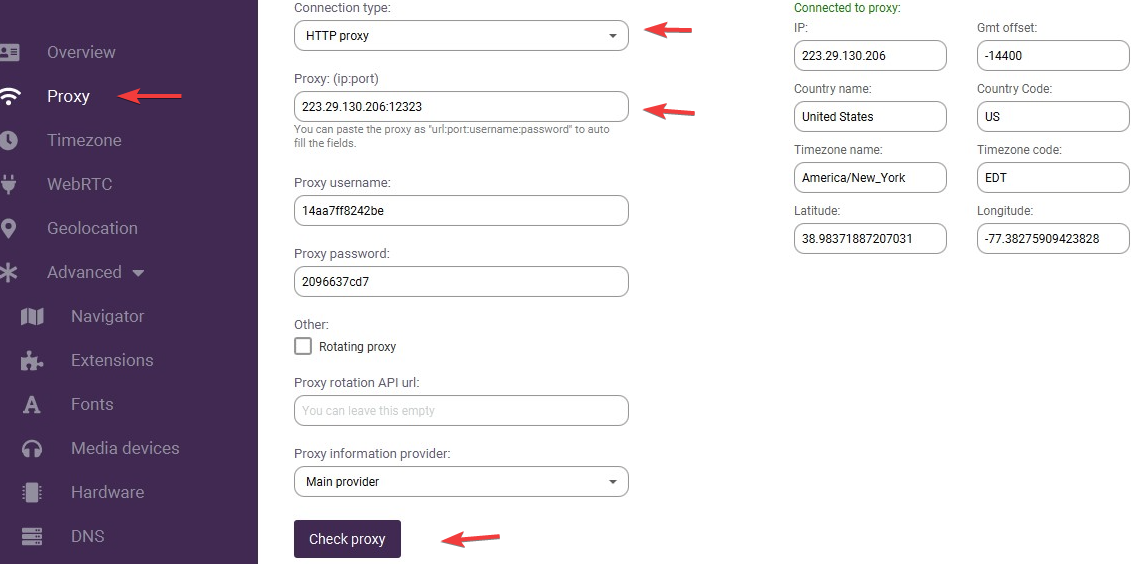
Step 6. Confirmation of Proxy
You can also verify your browser profile on “Whoer” or similar programs to make sure the IPRoyal proxy is functioning properly if you wish.
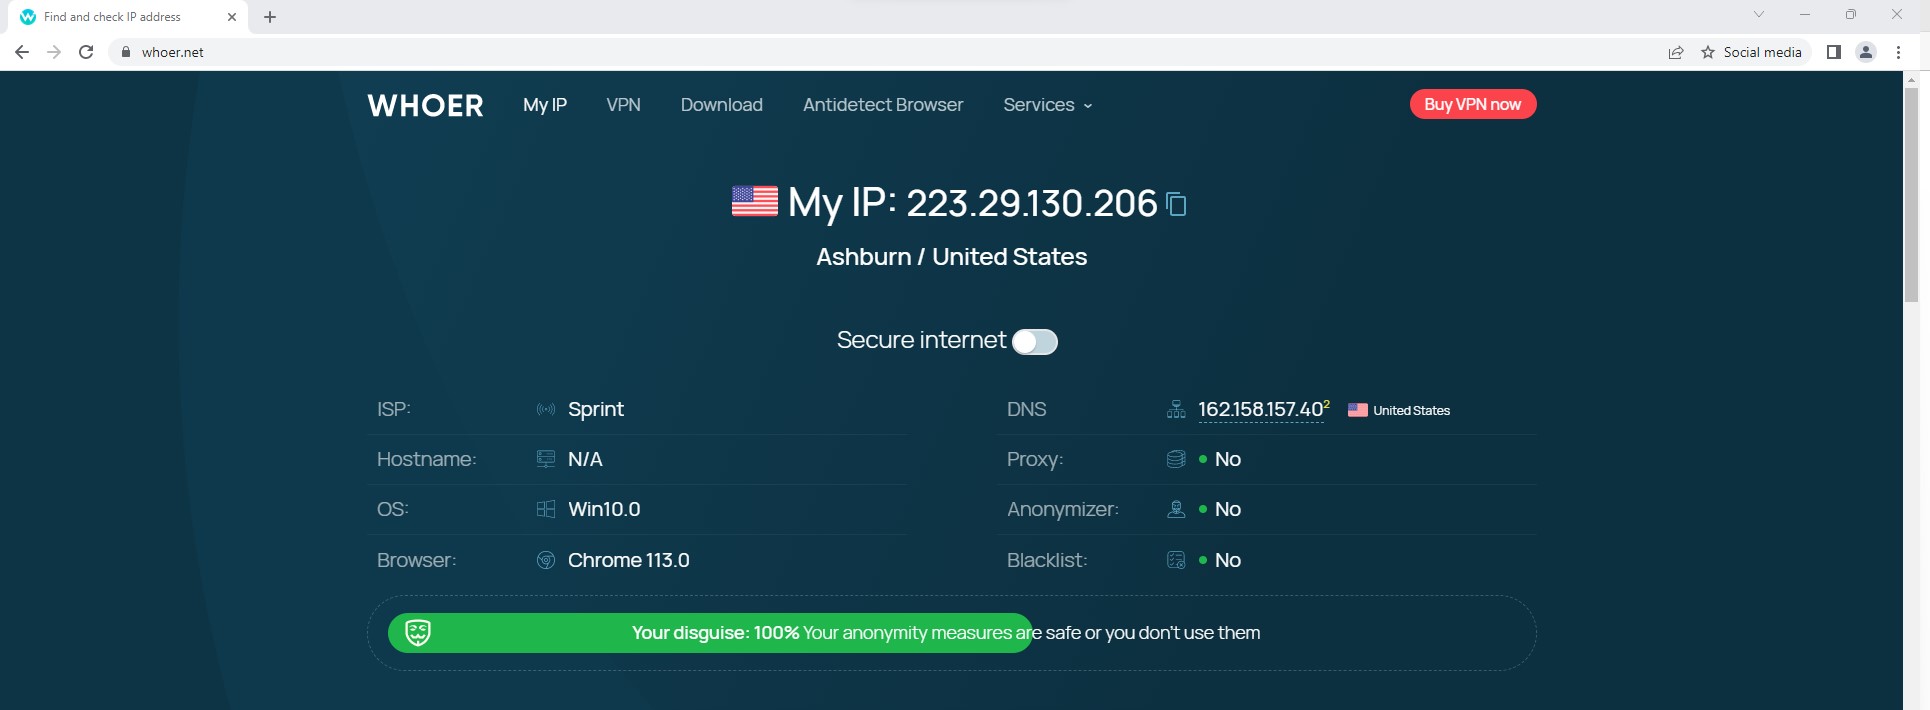
Finally! Your proxy site and Incogniton have been integrated successfully. You can open an incognito browser window by clicking Start on your newly created profile. You can now start running anonymously flexible web activities.
Conclusion
The power of IPRoyal’s expansive 8 million IPs, paired with the Incogniton anti-detect browser’s robust features, lets you browse the internet with more control. But even better, the setup and integration is a simple and straightforward one, as shown in this guide.
IPRoyal presents a remarkable proxy service offer that flawlessly complements Incogniton. Manage multiple accounts, scrape the web, conquer affiliate marketing, and use social media by your own laws — the possibilities are endless.
Kindly contact our team if you have any additional questions about using proxies with Incogniton, or any of our explanations so far.
What are you waiting for? Join >400K users now!
Frequently asked questions (FAQ)
Yes, you can manage multiple Facebook accounts with Incogniton’s browser profiles, and for free tier covers up to 10 unique profiles. Check out our well-detailed article on how to manage multiple Facebook accounts to learn more.
A proxy browser employs a proxy server to connect to the internet. Acting as a mediator between your device and the web, the server receives and forwards your requests, enhancing privacy by masking your IP address.
A digital fingerprint is a distinct and individualized digital marker encompassing data about a user’s browser, browsing pattern, and device, enabling companies to identify and monitor online users and their devices.
In simpler terms, a digital fingerprint is like a special mark that websites use to remember and follow you when you use the internet. If you’re interested in more details, we have a dedicated article that goes into further depth on browser fingerprinting.
A residential proxy is an IP address, be it from a desktop or mobile device that’s used to hide a user’s real IP address. Unlike Rotating proxies and Data Center proxies, it is a network of real IP addresses provided by internet service providers (ISPs), resembling a web-like structure.
Essentially, the residential proxy acts as a middleman between your device and the websites you visit, making your online presence appear as if it’s coming from the proxy’s location.