
Step 1: Create and sign in to your Incogniton account (free)
To integrate Swiftproxy with Incogniton, you first need to set up an Incogniton account. If you already have one, feel free to skip this step. Otherwise, follow the steps below. No credit card required.
- Go to incogniton.com. Click Download in the top navigation bar.
- Choose the right version for your operating system (Windows or Mac) and start the download.
- Once the download is complete, install the Incogniton app on your device by following the installation prompt.
- After installation, go to the Pricing page on the Incogniton website.
- You can choose from various plans, including Starter (free), Starter Plus, Entrepreneur, Professional, or even a custom package. We recommend starting with the free plan if you’re new.
- Register for a free account by filling in the required details. After completing the process, you’ll receive your login credentials via email.
- Open the installed Incogniton app and log in using your credentials.
And that’s it — you now have a working Incogniton setup ready for Swiftproxy!
Note: If you run into issues while setting up your account, contact the support team at [email protected].
Step 2: Create your Swiftproxy account
To use Swiftproxy with Incogniton, you’ll need a Swiftproxy account. Here’s how to get started:
- Visit the official Swiftproxy website and click Create an Account at the top right corner, or choose Get Started or Sign up with Google in the hero section.
- On the registration page, fill in your details to create an account, or sign up via Google authentication if you prefer.
- Once registered, log in to access your dashboard.
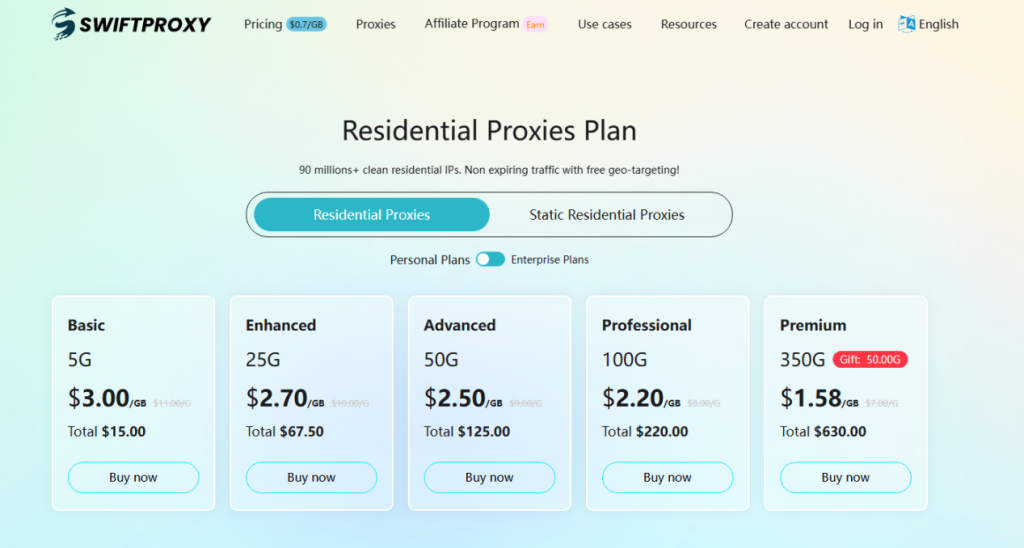
Step 3. Set Up Swiftproxy Portal
After successful registration, you’ll land on the Swiftproxy.
From here, select a suitable proxy plan based on your needs — options include Residential Proxies and Static Residential Proxies.
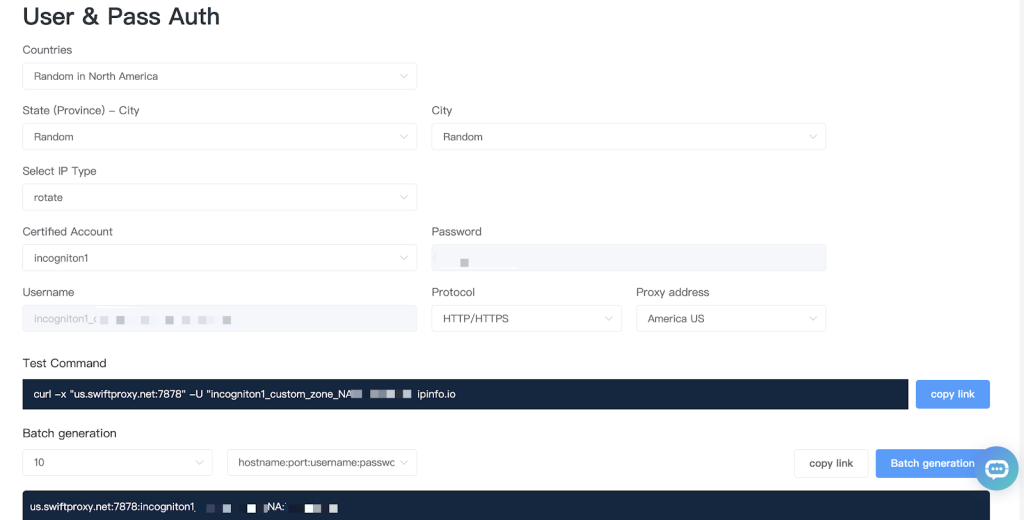
Now, visit the Swiftproxy dashboard and configure your proxies.
- We are using Random IPs from North America with IP rotation on each request using HTTP/HTTPS protocol in this case.
- Copy the host:port:username:password at the bottom, then return to the Incogniton app.
Step 4: Integrate Swiftproxy with Incogniton Browser
Now comes the core step — connecting your Swiftproxy to the Incogniton browser:
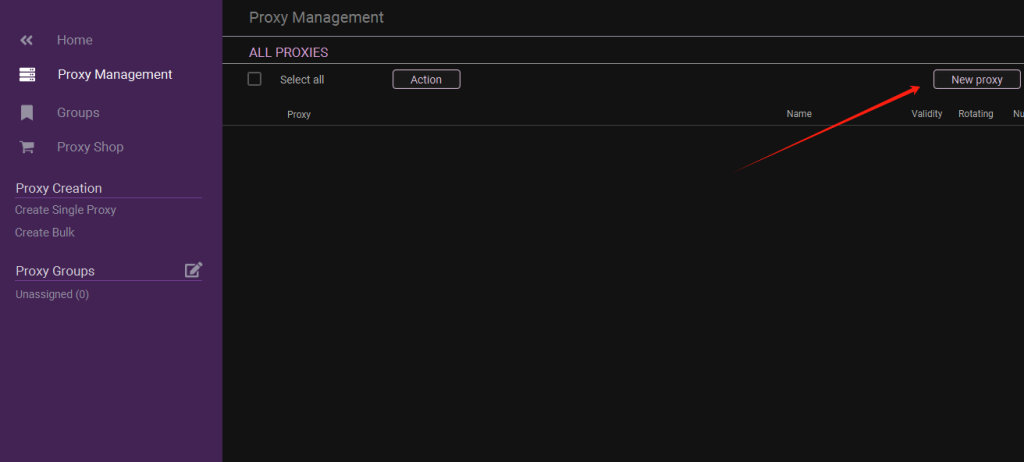
- Open the Incogniton app and go to Profile Management on the sidebar.
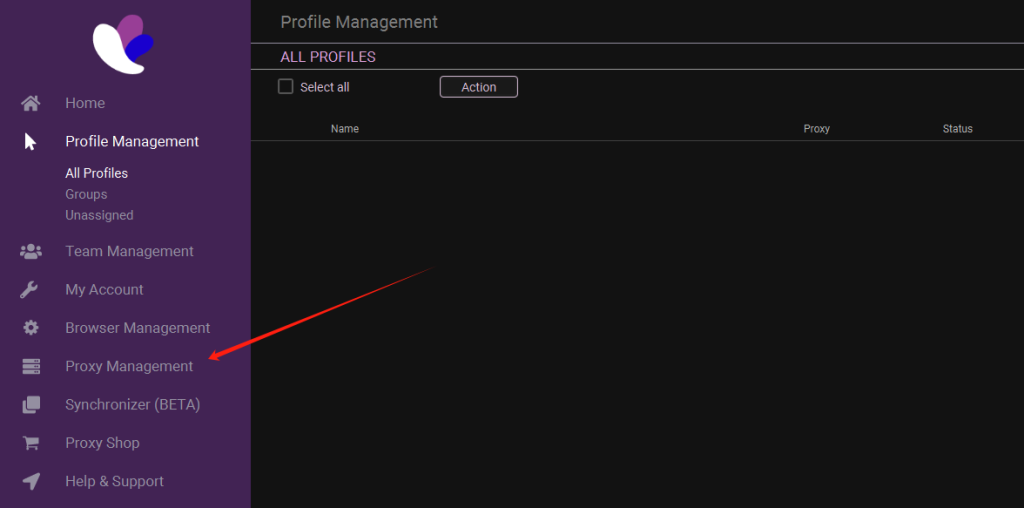
- Tap “Add Proxy” at the top right.
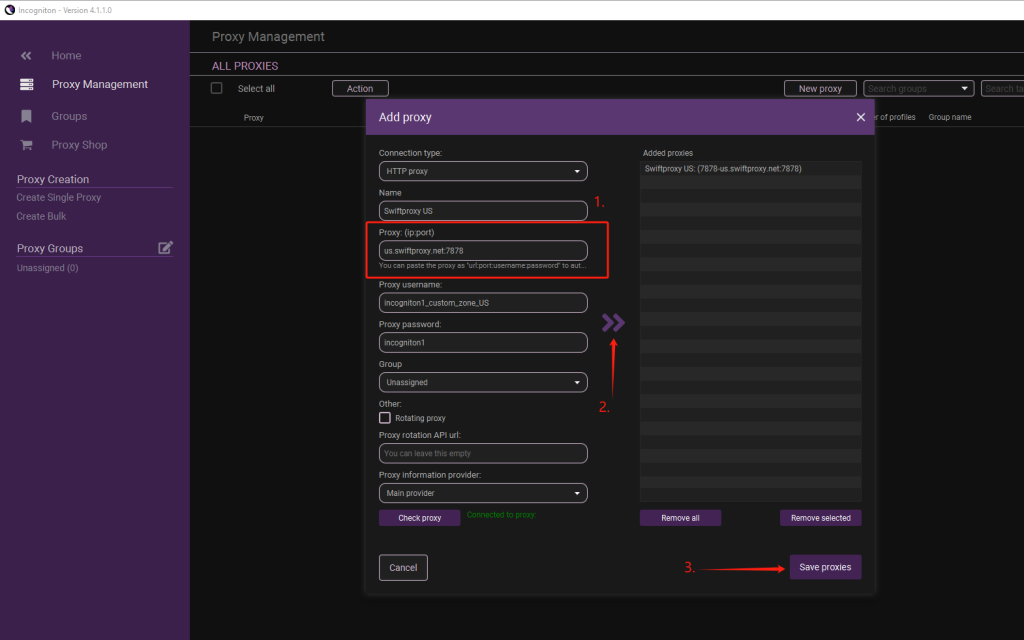
- Copy and paste the host:port:username:password into column 1. Checkmark the “Rotating Proxy” if your proxy is in Rotating mode. Finally, click Save Proxy to proceed.
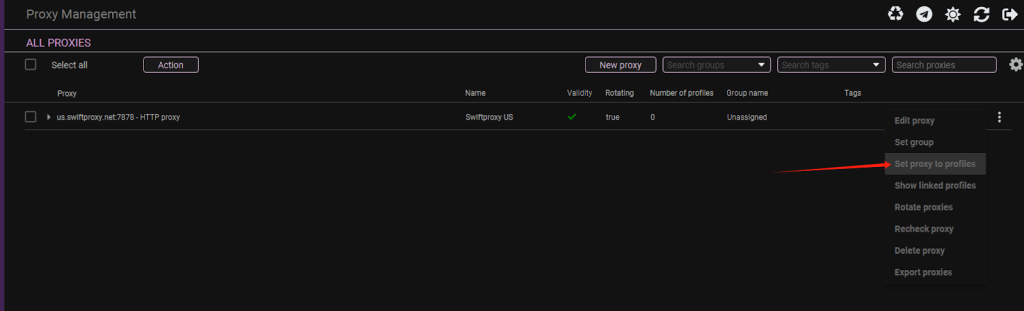
- Once the proxy is configured, you may set it into one of your created Incogniton browser profiles.
Conclusion
Congratulations! You’ve successfully integrated Swiftproxy with the Incogniton Anti-Detect Browser.
By following this step-by-step guide, you’ve unlocked a new level of control, privacy, and efficiency. Whether you’re managing multiple online accounts, running ad campaigns, or conducting web testing, the combination of Incogniton and Swiftproxy ensures you do it securely and anonymously.
With Swiftproxy’s reliable residential proxies and Incogniton’s powerful profile management, your online identity stays protected, and your workflow remains seamless.
If you encounter any issues during the process, contact the Incogniton support team at [email protected] or reach out to the Swiftproxy team for assistance.