Step 1: Register or Sign in to Incogniton
If you already have an Incogniton account, you can skip this section. Otherwise, follow the instructions below to create an account:
- Visit the Incogniton website and navigate to the Download page.
- Choose your device’s operating system (Windows or macOS).
- Install the application by following the on-screen instructions.
- Navigate to the Pricing page on the Incogniton site.
- Select a plan — Free, Starter Plus, Entrepreneur, Professional, or a custom package. The free tier is a suitable starting point for new users.
- Create your account by entering the required details. Your login credentials will be emailed to you.
- Launch the Incogniton app and sign in.
Note: For assistance during setup, contact [email protected].
Step 2: Purchase Proxies from Proxys.io
To purchase proxies from Proxys.io, follow these steps:
1. Visit the Proxys.io website and click the Buy Proxy button on the main page.
2. Choose your proxy preferences, such as proxy type, country, rental period, and quantity.
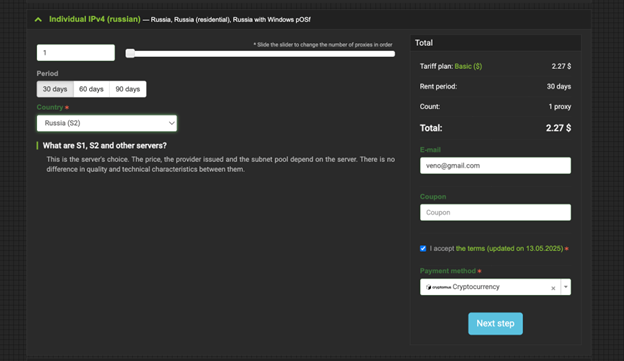
3. Enter your email address and select your preferred payment method.
4. Complete the payment process using a credit card, crypto, or any supported method.
5. After payment, your proxy details will appear immediately in your Proxys.io personal account, ready for use.
Step 3: Configure Your Proxys.io Proxy
Configure Your Proxys.io Proxy in the Proxys.io dashboard:
- Select your preferred proxy type (e.g., Individual IPv4, Shared IPv4, Mobile, IPv6).
- Copy your proxy credentials in the host:port:username:password
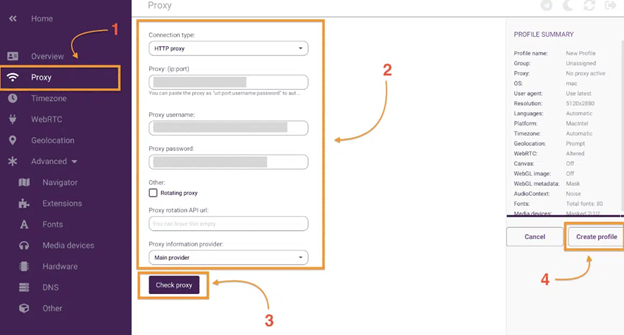
Step 4: Add Proxys.io Proxy to Incogniton
After obtaining your credentials, integrate them within the Incogniton app.
- Open Incogniton and go to Profile Management from the sidebar. Create a new profile if you do not have one.
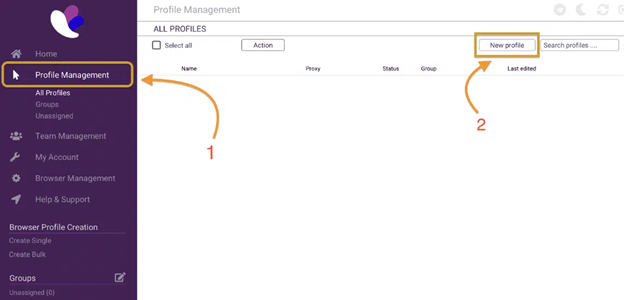
2. From the profile list, click the dropdown next to your desired profile, select Edit, and then click Add Proxy on the edit screen.
3. Paste your Proxys.io proxy string (host:port:username:password) into the respective column.
4. Proceed to Check Proxy, and if the connection is successful, click Update Profile to save the proxy details.
You can now assign this proxy to any of your browser profiles.
Note: To test your proxy configuration, you can use the whoer.net online tool.
Conclusion
You have successfully integrated your Proxys.io proxy with Incogniton. This integration allows you to take advantage of Proxys.io’s reliable global proxy network while using Incogniton’s robust profile isolation — ideal for multi-account workflows, advertising operations, automation, and social media marketing.
If you run into any issues along the line or need further help, contact Incogniton support at [email protected] or reach out to the Proxys.io support team at [email protected] for any proxy-related issues.