Step 1: Create and Sign In to Your Incogniton Account
- Visit the official Incogniton website and download the application for your operating system (Windows or macOS).
- Install the application and complete the setup.
- Register for an Incogniton account if you do not already have one, then open the app and sign in.
Once signed in, proceed to set up HypeProxies.
Step 2: Set Up Your HypeProxies Account
- Visit https://hypeproxies.com/ and sign up for an account or sign in.
- Add funds to your account if required, or select any available trial option.
- From the dashboard, go to create a proxy and select the available static ISP proxy These proxies provide persistent, ISP‑labeled IPs, unlimited session duration, and unlimited bandwidth, making them suitable for long‑running and multi‑account workflows, including high‑demand and protected targets.
Step 3: Create a HypeProxies Proxy and Retrieve Credentials
- In your HypeProxies dashboard, complete the proxy creation process for the chosen proxy type.
- Once the proxy is ready, copy the provided credentials (host/IP, port, username, password). HypeProxies proxies are available across top U.S. locations and include free replacements if an IP needs to be swapped.
Delivery is typically quick for static ISP/residential proxies, and credentials appear on the dashboard once ready.
Step 4: Integrate Your HypeProxies Proxy With Incogniton
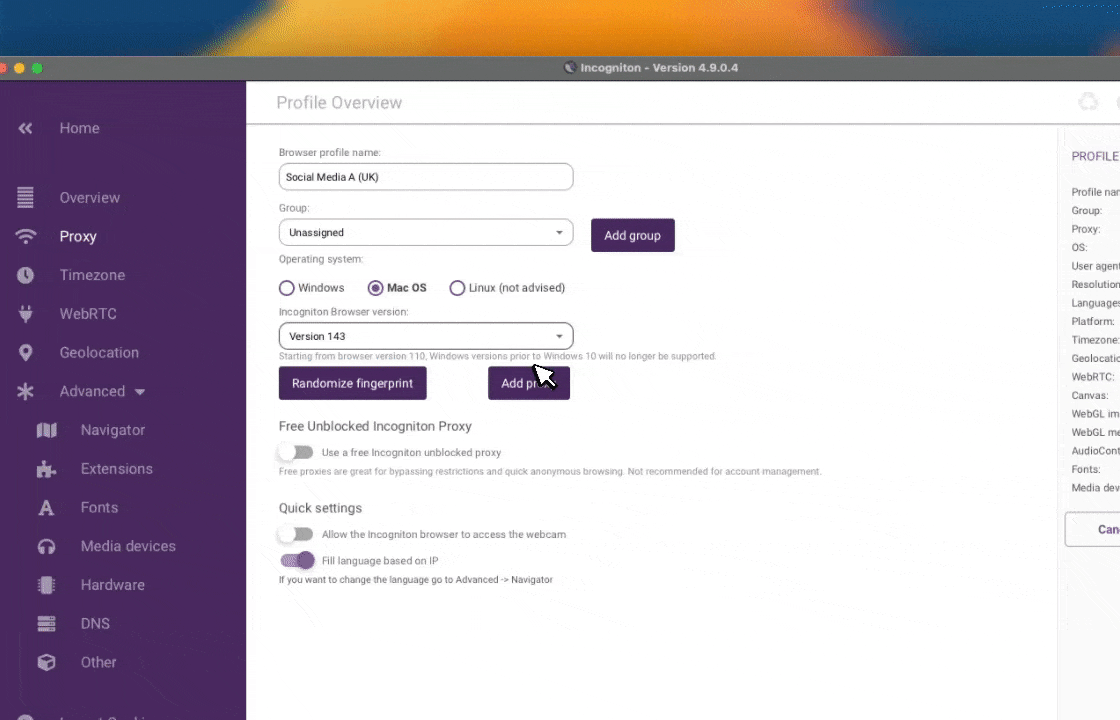
- Open the Incogniton app and navigate to Profile Management, then create a new browser profile or edit an existing one.
- In the profile settings, open the Proxy section and enter your HypeProxies credentials, including the host or IP address, port, and authentication details if required.
Use Check Proxy to verify the connection, then click the Create profile button once verification succeeds.
Step 5: Launch and Verify Your Profile
- In Incogniton, click Start on the configured profile.
- Within the profile’s browser, visit an IP-checking service to confirm the profile is using the expected IP.

After verification, the profile is ready for production use with its own isolated browser state and dedicated HypeProxies network identity.
Conclusion
This guide walked through the complete process of connecting HypeProxies with Incogniton, from preparing your accounts to attaching a static ISP proxy to an isolated browser profile.
When signing up for HypeProxies, you can apply the discount code INCOGNITON to receive 10% off premium static ISP proxies.
Used together, Incogniton and HypeProxies provide a practical combination of browser‑level isolation and stable, high‑trust network identity, supporting long‑running and multi‑account workflows with greater consistency.