Step 1: Create and Sign In to Your Incogniton Account
Visit the official Incogniton website and download the application for your operating system (Windows or macOS).
Install the application and complete the setup.
If you do not already have an Incogniton account, register first, then open the app and sign in.
Once signed in, proceed to configure your Coronium proxy.
Step 2: Set Up Your Coronium Account
Create an account at the Coronium dashboard and verify your email to unlock access.
From the dashboard, open Add Proxies and complete the setup in three stages: first select the proxy location, then configure the proxy by choosing the mobile carrier, region, and tariff plan. And finally, proceed to payment using the available methods, including Stripe (card payments) or supported cryptocurrency options.
Once the order is processed, ensure the proxy appears as active in your account before continuing.
Step 3: Retrieve Proxy Credentials
Open the Your Proxies section in the Coronium dashboard and copy the connection details provided:
- Hostname or IP address
- Port number
- Supported protocol (HTTP/HTTPS or SOCKS5)
- Username and password
Coronium proxies are tied to dedicated mobile devices. IP rotation can be triggered manually from the dashboard, scheduled at defined intervals, or automated using the provided API reset link. Use the current session settings unless your workflow specifically requires rotation.
Step 4: Integrate Your Coronium Proxy With Incogniton
Open the Incogniton app and navigate to Profile Management, then create a new browser profile or edit an existing one.
In the profile settings, open the Proxy section and enter the Coronium proxy details, including the host or IP address, port, protocol, and authentication credentials if required.
Use Check Proxy to verify the connection, then click Create/update profile once the check succeeds.
Step 5: Launch and Verify Your Profile
In Incogniton, click Start on the configured profile.
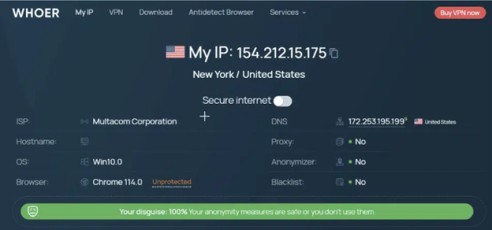
Within the profile’s browser window, visit an IP-checking service to confirm the profile is using the expected mobile IP address and location.
After verification, the profile is ready for use with its own isolated browser state and dedicated Coronium mobile network identity.
Conclusion
This setup connects a dedicated Coronium mobile proxy to an isolated Incogniton browser profile, ensuring each environment runs with its own carrier-backed IP context.
Used together, Incogniton and Coronium provide a clear separation between browser identity and mobile network routing, supporting long-running, multi-profile workflows where stability, trust, and controlled isolation are required.