
Nota! Esteja ciente de que você precisa comprar proxies por conta própria, a Incogniton não vende proxies. Você pode obter seus proxies BlazingSEO através deste link.
Configurando sua conta BlazingSEO
Depois de criar uma conta BlazingSEO e comprar os proxies desejados, você precisa ir para a aba ‘Proxy settings / API’ no portal BlazingSEO. A partir deste portal, você pode recuperar o código API que você precisa inserir no Incogniton para configurar a integração.

Depois de recuperar a chave API, há outra coisa que você precisa fazer para configurar o portal corretamente. Você faz isso indo para o ‘Painel de controle de proxy’ e alterando o tipo de autorização para ‘Usuário / senha’.
Atenção! Se você não fizer isso, a integração entre BlazingSEO e Incogniton pode não funcionar diretamente.

Configurando o Incogniton para a integração com o BlazingSEO
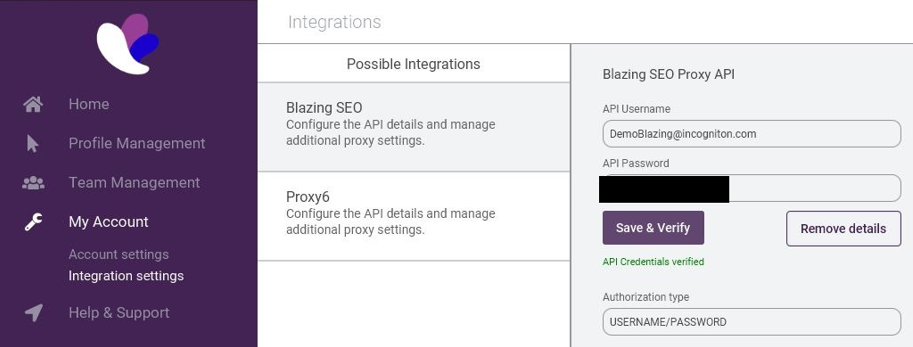
Depois de recuperar a chave API, você pode configurar ainda mais a conexão da API no Incogniton na guia Minha Conta. Uma guia “Configurações de integração” é visível no ambiente Minha Conta no aplicativo. Clique nela e uma página será aberta onde você precisa inserir a chave API e seu e-mail que você usa para o portal BlazingSEO. Nisso, você precisa clicar no botão ‘Salvar e verificar’. Se você inseriu o link da API corretamente, uma linha verde aparecerá indicando “Credenciais da API verificadas”. Depois de concluir as etapas, a conexão da API está ativa e pronta para uso.

Como atribuir um proxy via integração
Assim como criar um perfil de navegador regular, você deve fazer isso através do botão ‘criar único’. Depois de inserir o nome para o perfil do navegador, você pode selecionar um de seus proxies BlazingSEO na guia ‘proxy’. Para fazer isso, clique no menu suspenso e selecione BlazingSEO. Depois disso, os proxies que você comprou ficarão visíveis. Através do botão ‘Usar’ você pode selecionar o proxy que deseja usar para o perfil do navegador e o proxy será configurado automaticamente.

Para evitar que você use um proxy mais vezes do que deseja, adicionamos uma funcionalidade que mostra quantas vezes um proxy é usado no Incogniton. Na coluna “Usado”, você verá um número que mostra quantas vezes você usou um proxy para um perfil de navegador.
